Kanzashi wedding decorations. Kanzashi wedding decorations
Preparing for a wedding ceremony requires a carefully thought-out plan and scenario, and kanzashi wedding decorations will perfectly convey the sensual atmosphere of the holiday. A wedding is a unique event in the life of every person. To hold a perfect wedding, you need to take into account all sorts of little things and nuances. The fundamental theme is design and decor, so most newlyweds choose the style and technique of decoration in advance.


Master class on decorating kanzashi for holiday accessories
The kanzashi style comes from Japan, quite elegant, created using ribbons and handmade materials. Thanks to its simplicity, it began to be used on all continents of the planet for a variety of events. To highlight all these elements at the holiday, you need to know the rules for creating decor in this style. This style can easily be done independently, and this is its charm and uniqueness.
On any festive table there are wine glasses and champagne. From time immemorial, boutonnieres convey the unique image of the groom; flower baskets will be a great addition to the main design. To decorate a wedding champagne bottle using this technique, you need to purchase the following materials:
- satin ribbon of any color;
- brocade ribbon in gold color;
- glue;
- bottle;
- scissors.
Direct registration involves the following steps:
- measure the satin ribbon from the neck, determine the required quantity;
- Having measured and determined the required quantity, cut the tape and apply glue;
- wrap the bottle with tape, covering the label. You definitely need to tighten the satin in order to smooth out any unevenness;
- The second and subsequent trimmed strips will be longer than the first; with them it is necessary to repeat the actions carried out on the first piece of fabric. After all the manipulations, glue the tapes;
- a golden ribbon is glued to the bottle in two rows;
- glue the material to the bottom of the bottle, on top of the tape, glue two pieces of satin ribbon, which was used at the beginning;
- cut 8 pieces of fabric, attach so that the seams are on the back of the bottle;
- use a stationery knife to make an incision at the seam edge, thread the tape into it;
- drop glue into the base and distribute it along the entire length of the tape;
- We use golden fabric to close the gap, trim the corners;
- glue lace, beads, ribbon bow.
DIY glass decoration
The main attributes on the table, besides champagne, are the glasses of the newlyweds. To decorate glasses in the kanzashi style you will need the following accessories:
- ribbons made of satin fabric, white and silver colors;
- elegant and lace braid;
- decorative elements
- candles;
- white nail polish;
- scissors and glue;
- wine glasses.
To complete the decor correctly, you must follow the following steps:
- cut the silver ribbon into two pieces;
- glue two thin strips to the wine glass so that they form a cross;
- wrap the silver ribbon in white cloth;
- use an elegant braid to intertwine previously woven ribbons;
- Glue the lace braid to the top;
- Glue beads and rhinestones along the edges;
- near the rhinestone decor, make varnish dots;
- white ribbons cut into a square shape will help you create a flower;
- to prevent the ribbon threads from shedding, the edges must be singed;
- square corners are connected and scorched with fire;
- solder ten similar petals together to form a bud;
- Glue a rhinestone into the center of the flower;
- Glue the flower at the intersection of the ribbons.


Ribbon boutonniere
Boutonnieres are the main and established attribute of grooms at a wedding. Such accessories lend themselves perfectly to self-creation, without the involvement of decorators and designers. The remarkable thing about boutonnieres made in the form of kanzashi is that they are unique and non-standard. To make the groom look amazing in all the photos, you will need the following accessories:
- satin ribbons of different colors;
- needle and thread;
- candle;
- scissors;
- beads, rhinestones, etc.
In order to make the accessory itself, it is important to go through the following steps:
- cut satin ribbons into pieces;
- the workpieces are singed so that the threads do not fall off;
- the finished element must be connected in the middle, the other edge folded back. If you connect at an angle of ninety degrees, you get the petals of a flower;
- It is important to repeat similar actions with other pieces of tape;
- the edge of the blanks is stitched with thread;
- collect all the preparations and a common bud is assembled;
- It is important to remember that the three flowers must differ in size;
- then, you need to stretch the thread through the large, medium and small bud, so that the small one ends up at the end, it is desirable that the flowers differ in color;
- the accessory can be stitched several times, then secured with a knot;
- decoration is done using rhinestones, beads or other options that exist in fantasy.
In addition to decorating accessories, kanzashi are used in various ways. Hair decorations distinguish the bride, highlight her individuality and uniqueness, and complete the image. Any design in this style will delight young people, add originality, and lift their spirits.


Interesting video
Rida KhasanovaKanzashi are Japanese floral ornaments that were traditionally used for hairstyles. Recently, they have gained great popularity, especially as accessories to the bride’s wedding look. Now this is what they call not only the jewelry itself, but also manufacturing technique.

Kanzashi comb for a wedding for the bride
Kanzashi decorations for weddings
Literally, “kanzashi” means the word “ hairpins" They served not only as decoration, but also as a means of protection, thanks to their pointed end. The accessory is made of satin fabric or ribbon, which is folded according to a certain pattern, reminiscent origami technique. The result is a very beautiful and elegant decoration.
Hairpins, tiaras, bouquets, brooches and combs are made in the kanzashi style. The composition can use one bud or several, located volumetrically or along one line
Wedding kanzashi will not suit every dress, so you need to be careful when choosing an outfit. A classic dress with a full skirt and a hairstyle decorated with Japanese flowers will look ridiculous.
The best solution would be combine kanzashi with a dress made of satin, silk or jacquard fabric. You can choose any style and length, but an A-line dress with a tight-fitting bodice would be ideal.
A dress trimmed with a wide satin ribbon at the waist looks great with kanzashi decoration. But it is not at all necessary to use oriental style, since wedding jewelry in the kanzashi style has long become a European decoration.

Kanzashi necklace for the bride
DIY kanzashi hairpins for weddings
Sometimes it’s difficult to find an accessory that matches the color and style, so it’s easier to make it yourself. A detailed master class on making wedding kanzashi decorations for the bride’s hairstyle will help you do it yourself.
What you will need for work:
- satin ribbon 5 cm wide;
- metal pin;
- small button;
- transparent rhinestones or halves of pearls;
- thread and needle;
- scissors;
- tweezers;
- lighter (candle, matches);
- glue.
How to do:
- Cut the tape into equal squares. For each hairpin you will need 9 pieces of such squares.
- Bend the square of tape diagonally and grab it with tweezers for convenience at the bottom corner. Fold in half again.
- Bend the upper triangle in half from the left side to the right. Do the same with the lower triangle.
- Trim the open corner with scissors so that it is neat and lightly scorch it over the flame so that the layers of fabric stick to each other. If a candle is used, the cloth should be kept in the middle of the flame to prevent it from becoming sooted.
- Carefully trim the bottom of the resulting petal with scissors and also melt it with fire.
- Gently straighten the petal to give it a convex, oblong shape. To create one inflorescence you will need 6 petals and 3 smaller ones. They need to be performed using the same technique.
- Thread a needle with a thread of a suitable color. First, string large petals, tie a thread and cut off. The first tier of decoration is ready.
- In the same way, string three small petals onto a thread - they will serve as the second tier.
- Hot melt adhesive is best for gluing parts, but you can also use regular transparent “Moment”. Pass the hairpin through the button.
- Apply a large drop of glue to the button and press a large inflorescence made of satin ribbon to it. Wait until the glue hardens completely.
- Apply another pea of glue in the middle of the flower and press the small flower. Glue a rhinestone or pearl into its core.
The original decoration for the bride's hair is ready!

Preparing a petal using the kanzashi technique

Kanzashi hairpins for a wedding
Double bouquet using kanzashi technique for the bride
The tradition of throwing a bridal bouquet to unmarried bridesmaids continues to be popular. But often the bride feels sorry to part with her bouquet, so for this purpose a double is used. It is not difficult to make such a kanzashi composition with your own hands - the bouquet will turn out very elegant and festive if you use this technique.
To prepare a duplicate bouquet, you need purchase the following accessories:
- satin ribbon of different shades: for flowers, leaves and handles;
- cardboard roll (for example, from food foil);
- foam ball;
- scissors;
- wire;
- openwork ribbon;
- more decorative details (rhinestones, beads, pearls);
- hot-melt gun with transparent glue.
To prepare one flower you will need about 40 cm of tape: 11 pieces 2.5-3 cm wide and 7 cm long
How to do:
- Bend the edge of the ribbon into a triangle and hem it with thread of a similar shade. Pull the thread in so that the ribbon gathers into a petal shape. Prepare 10 more parts in the same way.
- Cut 5 cm of wire with a diameter of about 6 mm. Bend one edge into a small loop.
- Coat the edge of the petal with glue and wrap it around a loop of wire. Attach 2 more petals in a circle - you get a bud.
- Next, glue 3 petals in a more straightened form, and another 5 petals in the third row - you get a rose.
- Cut the green satin ribbon into pieces with sides of 5 cm. Fold in half and singe the edges over the fire. Drop a little glue onto the edge and press the leaves under the flower bud.
- Cut the foam ball into 2 equal parts - you will only need one half. Cut a place in it so that you can insert a cardboard roll.
- Cut the roll to leave a neat little handle that is comfortable to hold in your hand. Coat the edge thoroughly with glue and insert it into the foam base.
- When the glue is completely dry, wrap the handle with tape and secure with glue.
- String the roses onto the ball using pins or glue them so that there are no empty spaces left.
- Additionally decorate the composition rhinestones or beads, feathers - as your imagination dictates.

Kanzashi wedding bouquet
It’s so easy to make unusual, eye-catching kanzashi wedding decorations for the bride with your own hands. It will look harmonious groom's boutonniere, made in the same style, as well as small holiday details, for example, invitation cards or wine glasses for newlyweds.
29 July 2018, 14:43This decorative art is based on the ability to fold different petals from scraps of fabric. Petals can be round, long or sharp. Craftswomen use tweezers to collect petals from small pieces of silk and glue them to the base. This article will tell you and show you how to properly make kanzashi wedding decorations.
The word "kanzashi" (kanzashi) translated from Japanese means "hairpin". This art was invented by Japanese women. It was born when tall hairstyles came into Japanese fashion, which had to be fixed with various fastenings made of hairpins.
To make a wedding decoration using the kanzashi technique you need:
- Ribbons and fabrics of different shades.
Experienced craftswomen love to use satin ribbon fabric. This material is very pliable and easy to use. It is well suited for firing and is easy to cut with scissors, and the most important thing is that it always maintains the desired shape.
Crepe satin is also sometimes used, but it does not react well to firing. If you hold it over the fire for a little while, the product may burn.
You can also use organza. But when cutting, the threads spill out of it a lot.
- Centimeter or ruler. Will be needed to measure the dimensions of the workpiece.
- A small piece of soap or pencil. Useful for sketching.
- Sharp scissors. Useful for cutting ribbons.
- Thread and thin needles. Needed for stitching crafts made from ribbons.
- Small forceps or tweezers. They are convenient for pressing or picking up small parts. They are also convenient for holding the workpiece over the fire.
- Lighter, candle, matches or soldering iron. Necessary for singeing the ends of workpieces. Everyone chooses what they feel most comfortable working with.
- Base for decoration
Buy a simple hoop, elastic band or hairpin. You will mount the finished product on them.

You need to use special glue; PVA will not work. You need to use glue that will quickly hold the pieces of fabric together. The ideal solution would be to purchase a glue gun. With its help, you can quickly, and most importantly carefully, glue workpieces together.
- Decorations. For example: beads, rhinestones, beads, etc.
- Hairspray with strong hold. You can sprinkle it on the finished product so that it does not lose its shape.
The most important forms of kanzashi petals
1. Sharp petals
A diagram that will help you make sharp petals

2.Round petals
A diagram that will help you make rounded petals

Master class for making a wedding comb

You will need:
- White ribbons (sizes 2.5/50 and 2.5/25);
- Green ribbon;
- Glue (hot);
- Candle or lighter;
- Felt;
- Fishing line and beads.
Let's start by making roses. For this product you will need 3 roses.
First you need to make a felt circle with a diameter of 5 cm, for this you will need a compass. Two lines are drawn from the center of the circle and a triangle is cut out. After the edges are glued together you will get a cone.
Now we roll up the tape and form petals, securing them with glue. The petal is formed using the method of tucking the ribbon over the previous petal so that a triangle is always formed.
Now the triangles are laid out around the entire circumference of the cone. When they completely fill the felt cone, you need to cut the tape at a certain angle and wrap it into the inside of the cone. Now all that remains is to glue it well.
This exclusive comb will decorate your hair and complement your wedding look.
What you will need to create a kanzashi wedding bouquet with your own hands

The bouquet requires the purchase of certain accessories:
- A straight stick for the stem of a bouquet;
- Funnel-shaped base;
- Foam ball replacing the floral base;
- Rigid mesh or lace;
- Stamens (easy to purchase at a specialty store);
- Scissors, wire and needle;
- Satin ribbon size 100/3 or 100/2;
- Hot-melt gun with special glue.
1. Prepare the base
Wrap the foam ball with twine, insert the stick into the ball and coat it with glue. After the glue has completely dried, you need to wrap the stick with twine, and then rewind it with a satin ribbon of a certain color. The base is ready.
2. Making flowers
To do this, you will need to cut a circle from thick fabric and draw the cut segment. You need to sew a segment in the shape of a cone. This is done using a 2 cm wide tape, the edges are secured with a needle and thread.
3. Attach flowers
You need to secure all the flowers to the base. They are decorated with feathers, beads, stones and rhinestones. We attach the flowers using a heat gun.
The kanzashi bouquet is ready for the wedding ceremony.
Kanzashi (in another transcription - kanzashi) came to us from Japan. These are traditional floral hair accessories. Recently, kanzash have become very fashionable: this is the name not only for the jewelry itself, but also for the technology for making it from fabric. Bright and original kanzashi are wonderful wedding decorations.
Photo: @clio1789 - flickr.com
“Kanzashi” is translated from Japanese as “hairpin”: elegant hairpins, decorated with flowers, were also a means of self-defense thanks to the sharp tip hidden in the hair. Nowadays it is not so much the jewelry itself that is called this, but the technology for making it. Kanazshi is made from fabric, although it is based on the traditional Japanese technique of origami: fabric or ribbons are folded in a special way and the result is incredible and stylish floral decorations.
Kanzashi wedding jewelry is not suitable for every outfit. Therefore, a bride who wants to decorate her hair with a comb or a hairpin with flowers should think through the entire look in advance. Kanzashi with a traditional fluffy wedding dress trimmed with lace will most likely look ridiculous and tasteless. Outfits made of satin, silk, jacquard and other noble fabrics will be better combined with this decoration. The style can be different, as well as the length of the dress. A-shaped dresses with a tight-fitting bodice and a wide skirt go well with kanzashi jewelry.
Kanzashi flowers also look good with ribbon decor. A wide bow will also be an appropriate decoration - a nod to the costume of Japanese geishas. However, it is not at all necessary to use oriental stylistics: kanzashi have become completely Europeanized and no longer carry the meaning that they had in medieval Japan.
 Photo: @Catherine - flickr.com
There is a huge variety of modern kanzashi jewelry. Brooches, combs, and hairpins are made in this style. The composition can also be different: one or several buds arranged linearly, or a volumetric composition with pendants.
The photo below shows a modern hairstyle decorated with kanzashi with hanging elements.
 Photo: @Catherine - flickr.com

In Japan, kanzashi with pendants are more common, but European kanzashi are usually made more simply. This is usually one or more colors of different sizes that are sewn together and attached with glue to a comb or barrette base. Kanzashi flowers can also decorate hairpins or hoops.
 Photo: @amaebi79 - flickr.com
Kanzashi technology is not difficult to master, but it is painstaking work. Most often, flowers are made from multi-colored satin ribbons. To work, you will also need scissors, glue and accessories - a variety of beads, seed beads and other decor, which is needed not only for decoration, but also to disguise joints, seams or not very neat work.
You will also need a lighter or candle to process the edges of the ribbons. Some masters prefer to use a hair curling iron for this - a matter of taste.
 Photo: @iris - flickr.com
A master class on making kanzashi-chrysanthemums is presented in the video.
The technology for making an original hair decoration using lace, which is perfect for a bride, is shown in the video:
An interesting option for a winter wedding is the Snow Queen's crown using the kanzashi technique.
Bridal bouquet using kanzashi technique
Using the kanzashi technique you can make an incredible bridal bouquet. Ribbons make beautiful, delicate roses, elegant asters, and a variety of fantasy flowers. All of them are perfect for putting together a wedding bouquet. Flowers made from fabric do not fade or fall apart, and are ten times cheaper than a composition made from fresh flowers. In addition, the bride can keep the kanzashi bouquet as a keepsake and use it, for example, as a decoration for her home interior.
The master class “Wedding bouquet of kanzashi” is shown in the video below. The technology for making flowers can be any. The main thing is to make the right base for the bouquet: a cardboard tube is used as a handle (for example, a tube from foil or paper towels), as well as a foam base onto which the finished flowers are glued.
Interestingly, kanzashi can also be used to decorate interiors. For example, you can create interior flower balls. They are hung from the ceiling at different heights - the result is an unusual, stylish decor. True, creating such a decoration takes a lot of time. Master class - in the video below.
Wedding decorations are different. Jewelry stones and jewelry. Elite original works or made with your own hands. Kanzashi is a technique that, despite its simplicity, can pleasantly amaze others. In this article we will try to figure out what this technique is, how you can master it, and where to apply it.
What kind of “beast” is kanzashi?
Kanzashi, like many other things ending with the letter "i", comes from Japan and is translated as hairpin. This is the art with which geisha created flowers and other hair decorations from ribbons, threads and patience.


Now the scope of application of objects made using this technique has increased significantly. So, at a wedding, the bride can have a comb decorated in the kanzashi style, a wedding bouquet made in this technique, and even decorations for the wedding table. And all this was done almost according to the same scheme. The only difference is in size and assembly.
Materials for wedding decoration in kanzashi style
For any decoration we will definitely need:
- scissors of different sizes;
- universal glue, or better yet, a glue gun;
- threads to match the finished product;
- thin needle and pins;
- a candle or gas burner (some craftsmen use a hair curling iron);
- accessories;
- and, of course, all kinds of silk ribbons, most often using satin.
It is necessary to carefully select the material for work. Soft ribbons with uneven tension will most likely ruin the entire product.
Boutonniere for the groom made of satin linen
First, cut the multi-colored ribbons into pieces of different lengths.

We carefully seal all edges using a candle or hair curling iron to prevent the material from fraying.

We bend the corner of the first workpiece at an angle of 90, as shown in the photo.

Then we bend one end back. We carefully ensure that the bend is strictly in the middle.

Using a thread and a needle, sew the workpiece along the edge.

We carry out the same operations with all workpieces.
After all the elements have been collected, we assemble them first into flowers, and then into a boutonniere, stringing flowers from largest to smallest on a thread and securing the elements.

You can decorate it using beads, which will also allow you to further secure the finished product.

Your handmade boutonniere is ready.
Bride's comb
After watching the video below, you can make an original decoration for the bride’s hair and more.
Here we use a slightly different technique than in the master class with a boutonniere.
We carefully fix the tape in a certain way using a glue gun onto a felt cone. We fix the resulting roses on a felt base, additionally decorating them with beads and twigs with leaves. We attach the resulting composition to the comb.
Tableware decoration in kanzashi style
Using the kanzashi technique, you can decorate bottles of champagne that will be on the newlyweds’ table.
The master class will help us with this.
For work we will need:
- White trim – 10 meters
- Black trim – 8 meters
- Lace – 10 centimeters
- Rhinestones
- Glue stick
- Nylon bow
Initially, we remove the labels from the bottles. To do this, place them in warm water for about an hour.
Glue lace to the bottom of the neck. It turns out to be such a collar.

Then glue on the pieces of tape. Moreover, we do not cut it in advance, but directly on the bottle.

This is how we decorate the entire bottle.

We make a skirt from a nylon bow, gathering it onto a thread.


We make several such skirts.
Latest site materials
Cosmetology
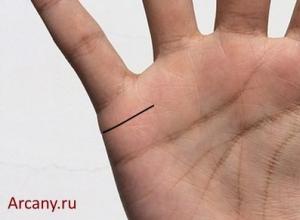
How can women tell by their hand how many marriages there will be?
People want to know a lot of things, including what the future holds for them. First of all, I am interested in the topic of marriage and love. The most asked question among girls in this area is: “When and how many times will I get married?” To find out, you don't have to contact
Experience
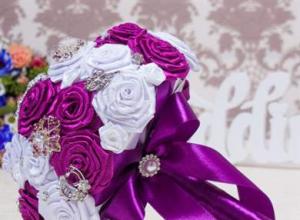
Kanzashi wedding decorations
Preparing for a wedding ceremony requires a carefully thought-out plan and scenario, and kanzashi wedding decorations will perfectly convey the sensual atmosphere of the holiday. A wedding is a unique event in the life of every person. For a perfect wedding, no
Horoscope
Phone case made of rubber bands
Elizaveta Rumyantseva For diligence and art, nothing is impossible. Contents Many craftswomen, having taken up weaving with the help of the Rainbow creativity kit, do not stop only at multi-colored bracelets and rings, and want to learn skills
Cosmetology
Instructions for making homemade nylon dolls
Do you want a unique collection of dolls for your child, or maybe you have an idea for creating a home puppet theater? Do-it-yourself dolls made from tights are a great idea for any creative project. It’s easy to find a couple in every apartment
Horoscope
Transmutation stones in Blade and Soul Transmutation stone bns
People have valued precious stones at all times. Experienced Jewelers have created and continue to create beautiful jewelry from them. In the game Blade and Soul, cutting stones will allow you to decorate your weapon with them, thereby increasing its parameters. Objects decorated with stones
Experience
We sew a personal metric panel from felt “Teddy bear on the moon Teddy bear sleeping on the moon from felt pattern
Do you love to create? If you immediately answered “yes” to this question, then this master class is for you! How to make your New Year tree different from others? Of course, decorate her with unique, interesting Christmas tree decorations. Such New Year's decorations can be


