How to embroider flowers on a shirt. Making traditional Ukrainian embroidery with your own hands
Vyshyvanka is a national Ukrainian clothing that adorns anyone who wears it. Many people are interested in how to make such a piece of clothing themselves, how to embroider an embroidered shirt with their own hands.
History of embroidery
According to archaeologists, the history of embroidery has very deep roots. Even the historian Herodotus wrote in 425 that the Scythians wore beautiful embroidered shirts with patterns. Excavations were carried out in the Cherkasy region, and a skillful hand-made embroidery was found, the pattern of which was created in the fourth century AD. Trypillian culture also has motifs that are repeated on embroidered shirts.
During the Neolithic period they also wore such clothes. Then it was made from simple
Motifs and patterns
These motifs can be geometric, floral, or zoomorphic. Geometric patterns include zigzags, diamonds, circles, ovals, and the infinity sign. Plant patterns show the beauty of the surrounding world, and the most common among them are “grapes”, “hops”, “viburnum”, “oak leaves”. All these patterns are combined in a certain sequence, and each region has its own combination of motifs for decorating products.
Do-it-yourself embroidered shirts are often decorated with a viburnum pattern, because this pattern symbolizes the power of the moon, sun and stars. The grapes on this clothing symbolize the joy and harmony of family life, and the red poppy protects the wearer of the shirt from the influence of evil forces.

The most common zoomorphic decorations for embroidery are the cuckoo, hare, rooster, fish, and owl.
There are differences in the design of men's and women's clothing. Thus, women's embroidered shirts were most often decorated with flowers, while men's items featured geometric patterns and oak leaves. DIY women's embroidered shirts for unmarried girls had patterns mainly on the sleeves, and if they were worn by mature women, the patterns were concentrated on the chest.
Selection of material for embroidery
Such clothes will be useful for your child for any event in kindergarten and any extracurricular event. First you need to choose the material from which you will sew it.
There are different materials suitable for sewing such a garment. Chiffon is a thin fabric that can be either artificial or natural. This kind of DIY embroidery, the pattern of which is in fashion magazines, looks very elegant. There is also a minus in creating this product from chiffon: it is difficult to embroider on it.

Products of this type made from gabardine also wear well. Gabardine is made from (wool from a breed of sheep such as merino is used). It is easy to wash, and this DIY women's embroidery fabric made from gabardine fits perfectly to any figure.
It is best, of course, to use linen for embroidered shirts. This is a rather expensive fabric, but the products made from it are beautiful. The most expensive type of linen is considered to be DIY embroidery, the patterns of which are known to all experienced craftswomen; made from homespun linen, it is in great demand. This fabric is made by hand and has a distinct off-white tint.
You can also use factory flax, which is produced in production. This material washes well and makes spectacular products.
Preparing for sewing
If you are interested in the process of creating embroidery with your own hands, then you must first make a pattern on paper or film. Moreover, you need to know the size of the person for whom you will sew.

To sew such a shirt with short sleeves, you will need a meter of linen fabric (if you count on sizes 42 -44). The same is true for men's embroidered shirts made with their own hands.
Also for the work you will need floss type threads, preferably in different colors. The most commonly used threads are red, pink, and green. Men's versions often have a combination of red and black colors.
In order for the embroidered pattern of crosses to look beautiful, you need to use a special canvas. This is a mesh that is attached to the main fabric, and after finishing the work it is pulled out.
Making a Shirt
So, we have a rectangle measuring one meter by half a meter, it will become the main part, and two rectangles measuring 46 by 20 centimeters, they will be useful for making sleeves.

It is very convenient to use this pattern to make an embroidered shirt for a boy with your own hands. When you make the back, shelves and sleeves, decorate them at the bottom with a hem pattern. It is very convenient to buy canvas, the very bottom of which is pressed and has holes in it. Then you can do embroidery directly on them.
Do-it-yourself embroidery, the patterns of which are very diverse, can be a real work of folk imagination and creativity. You need to decorate the parts of the shirt before joining them.
Once all the parts of the shirt are embroidered, you will need to connect them. This can be done manually, or using a sewing machine or overlocker. In the latter case, your seams will hold up better and look neater.
Different types of shirts
Do-it-yourself embroidery designs are varied. They can be decorated with both hand and machine embroidery.
They can be tunic-shaped, they can have shoulder inserts, they can be made with a yoke, they can be with a continuous one-piece sleeve.
Embroidered shirts are divided into two types depending on how the pattern is designed. There are “stripe” shirts, that is, shirts on which ribbons with a pattern are simply sewn, and there are those on which the pattern is embroidered directly on the material, that is, on linen. Experienced craftswomen who know well how to embroider embroidery with their own hands usually make the second type of shirt. But such clothes are more expensive, taking into account the fact that they are processed by hand.
Where to get patterns for embroidery
So, if you want to create national clothing, then you need to prepare all the necessary components. To create embroidered shirts with your own hands, you need to get patterns from somewhere.
You can go to a special store that sells ready-made diagrams in which all the colors are already indicated. You will also need threads and canvas; all this is included in a special kit. This set also comes with a needle with which you will do the work.

The second option is to buy a pattern painted on fabric. These colors wash off when washed. In this case, you will have to purchase the threads yourself.
The third option is modern. You can use a special program that will help you convert any image into an embroidery pattern. These are programs like Pattern Maker, and CrossStitchPro.
If you are seriously interested in DIY embroidery, then do not immediately take on complex patterns, but limit yourself to simple options that combine no more than seven to ten colors. It is important to choose the right needle, which will have a large eye and a blunt point. Do not forget to wash your hands before working, as dirt stains may remain on the threads.
It is better for a beginning embroiderer to take lighter threads for work, as mistakes are not so noticeable. It is better to embroider using satin stitch. To get new ideas for creativity, you need to go to a folk craft exhibition or a museum.
What does embroidered shirt go with, how to choose it
Do-it-yourself embroidery, patterns for which you can purchase at a hardware store, is perfect for a variety of life occasions. You can wear it for a holiday, you can wear it to the office, to a business meeting. This shirt goes well with jeans.
Many people wear embroidered shirts under both a jacket and a sports jacket. It turns out well, this is normal for the cold season.
If you are interested in how to choose the right piece of clothing, then you should definitely try it on before purchasing. The embroidered shirt should not fit the figure, and it should not be a loose robe. Bright and beautiful, on weekdays it is not only for you, but also for those around you.
Purpose of embroidery
This clothing has deep historical roots, and wearing it means that a person belongs to a certain family and class of society. Girls make their own embroidered shirts for their boyfriends, wives sew them for their husbands.
Embroidered shirts are often worn at weddings and used for stage performances. Many people want to wear such clothes to the office and to production, but then they need to be adapted into a modern look.
You also need to know how to wear such clothes. As a rule, embroidered shirts are not tied with a belt and are not worn open. Real embroidered shirts are restrained in color, there are no bright colors on them. This shirt of Belarusian origin is usually burgundy in color, with blue or green patterns.

Embroidery is considered a talisman that protects its owner from bad influences. Especially if it is hand embroidered. There were often cases when an embroidered shirt protected the one who wore it from illness and injury in war.
First steps in embroidery
Decide on clothes. Practice your skills. For example, a cross on cotton T-shirts, pants, shirts... They are convenient for the first work experience and are not the most expensive.
Select the decoration area. If this is a shirt, this is the best place for a personal logo (embroidery can also be regarded as a sign of your exclusive work):
- gate;
- cuffs;
- pocket;
- pockets;
- belt.
Select a drawing. When looking at diagrams, give preference to those that show patterns with a repeating pattern. They are easier to follow, especially at the initial stage of work.
When we improve our skills, we can cross-stitch complex logos and patterns: on the chest, and on the sleeves, and on the back of the product. Like in these photos:

What to do next - step two
We wash what we decorate. This way you will insure yourself against shrinkage of the fabric and distortion of the design, and check whether the clothes with embroidery are fading or not. Otherwise, it will be very disappointing if your handiwork and the hopes associated with it disappear during the first wash.
We also check the threads for color fastness: wet them, wrap them in white cloth and see if it has stained. If so, do not rush to get upset, but treat the threads by heavily soaping them with laundry soap (winding them, for example, on a clothespin) and immersing them in very hot water for 15 minutes. Rinse thoroughly in cold water and soak in a solution of vinegar and salt for several minutes. Then rinse again with your hands, wrap in a white cloth and iron. If there are stains again, it is best to boil the threads for about five minutes in a vinegar-salt solution. After this, they will definitely not shed, but will only delight you with their colors.
For the anti-molting solution:
- 1 glass of cold water;
- 1 tbsp. l. 9% vinegar;
- 1 tbsp. l. salt.

After ironing the clothes, attach the canvas in place of the design or logo, having previously ironed it.
It is better if it is a little larger than the figure on the diagram.
You need to secure the canvas tightly, smoothing out wrinkles with your hands, using pins or a stitching stitch. That way she won't squirm.
In order for the embroidery on clothes to be neat, there should be no noticeable punctures around the design, so the needle should have a small eye. And another tip: when cross-stitching in squares, try not to pierce the threads of the canvas itself, otherwise it will be difficult to remove. If you do everything correctly, it is easy to remove the canvas threads with your hands by alternately (!) pulling out its horizontal and vertical rows.
The patterns we offer in the photo (which are cross-stitched) can be perfect for the first experience of decorating clothes on your own for adults and children, or they can become your personal logo.
Having “stuffed” your hand, you will be able to use more complex patterns and embroidery patterns in clothes, giving it a special chic with your own hands.
Basics of satin embroidery
If you prefer satin stitch embroidery on clothes, you don’t need to use canvas.
Experienced embroiderers shared with us their tips for applying future designs to fabric:
- Having hooped the fabric, apply the design printed on thin paper and sew the outline manually or on a machine if you know how to sew with the conveyor lowered;
- draw the drawing with a chemical pencil;
- You can draw with a thin piece of dry soap, but not colored soap.
Choose any option, and don’t forget to break the pattern into sections, this will make it easier to embroider both a simple logo and a complex pattern.
Today we will talk about how to embroider a collar - but the collar is already ready, for example, the collar of a shirt or blouse that you want to decorate with embroidery.
On the one hand, this is much easier for beginners in sewing, since you don’t have to cut out the collar, which requires a lot of accuracy and a trained hand. But on the other hand, such embroidery on a finished collar will require no less diligence from you, since you need to achieve a high-quality result not only on the front side of the embroidery, but also on the back side, which can easily peek out while wearing the item.
At the end of the tutorial you will find small and simple designs that can be used to embroider collars.
To work you will need:
- Shirt or blouse with matching collar
- Embroidery design
- Floss
- sharp needle
- Fabric marker
- Small hoop
Step 1
If you can draw the design freehand on the collar, it will make things easier, but since we need two identical but mirrored designs, you may not be able to pull it off so easily. In this case, print the drawing on a printer.
Step 2

Hoop the collar - it won't be easy and you probably won't get the perfect tension, but try your best.
Step 3

Your task is to embroider the design using simple double-sided satin stitch and any desired stitches, so that the reverse side looks decent. It may not be as perfect as the front side, but you should be happy with it enough to feel free to show it off to anyone who wants to take a look.
To do this, avoid knots and broaches on the wrong side. All thread tacks should be hidden under subsequent stitches. If you are doing this, each of them must be secured separately; there should be no broaches between them.
Step 4

In a simple satin stitch, the stitches should be fairly tight, but do not tighten the thread too much so as not to deform the fabric.
Step 5

Perform the same pattern, but in a mirror image on the second half of the collar.

If you are ready to try your hand, choose any design from the presented ones - they are all quite simple to make!
Do-it-yourself embroidery on clothes (patterns)
Embroidery on clothes has not lost its relevance for many centuries. It didn’t matter what class a person was, everyone was sure to have clothes with embroidery. And particularly skilled craftswomen decorated the outfits of the rich class with their own hands, while remaining in modest embroidered clothes themselves.
True, initially hand embroidery not only decorated clothes, it was also given protective significance, but over the years the aesthetics of perceiving clothes with embroidery came to the fore. Embroidered clothing, regardless of whether it has a brand label or logo on it or not, is always original. And it doesn’t matter what technique your outfit is decorated with - cross stitch, satin stitch, stem stitch, cutwork... - the main thing is how it’s done. 


First steps in embroidery
Decide on clothes. Practice your skills. For example, a cross on cotton T-shirts, pants, shirts... They are convenient for the first work experience and are not the most expensive.
Select the decoration area. If this is a shirt, this is the best place for a personal logo (embroidery can also be regarded as a sign of your exclusive work):
- gate;
- cuffs;
- pocket;
- pockets;
- belt.
Select a drawing. When looking at diagrams, give preference to those that show patterns with a repeating pattern. They are easier to follow, especially at the initial stage of work.
When we improve our skills, we can cross-stitch complex logos and patterns: on the chest, and on the sleeves, and on the back of the product. Like in these photos: 


What to do next - step two
We wash what we decorate. This way you will insure yourself against shrinkage of the fabric and distortion of the design, and check whether the clothes with embroidery are fading or not. Otherwise, it will be very disappointing if your handiwork and the hopes associated with it disappear during the first wash.
We also check the threads for color fastness: wet them, wrap them in white cloth and see if it has stained. If so, do not rush to get upset, but treat the threads by heavily soaping them with laundry soap (winding them, for example, on a clothespin) and immersing them in very hot water for 15 minutes. Rinse thoroughly in cold water and soak in a solution of vinegar and salt for several minutes. Then rinse again with your hands, wrap in a white cloth and iron. If there are stains again, it is best to boil the threads for about five minutes in a vinegar-salt solution. After this, they will definitely not shed, but will only delight you with their colors.
For the anti-molting solution:
- 1 glass of cold water;
- 1 tbsp. l. 9% vinegar;
- 1 tbsp. l. salt.

After ironing the clothes, attach the canvas in place of the design or logo, having previously ironed it.
It is better if it is a little larger than the figure on the diagram.
You need to secure the canvas tightly, smoothing out wrinkles with your hands, using pins or a stitching stitch. That way she won't squirm.
In order for the embroidery on clothes to be neat, there should be no noticeable punctures around the design, so the needle should have a small eye. And another tip: when cross-stitching in squares, try not to pierce the threads of the canvas itself, otherwise it will be difficult to remove. If you do everything correctly, it is easy to remove the canvas threads with your hands by alternately (!) pulling out its horizontal and vertical rows.
The patterns we offer in the photo (which are cross-stitched) can be perfect for the first experience of decorating clothes on your own for adults and children, or they can become your personal logo: 


Having “stuffed” your hand, you can use more complex patterns and embroidery patterns in clothes, giving them a special chic with your own hands, using the patterns in these photos: 


Basics of satin embroidery
If you prefer satin stitch embroidery on clothes, you don’t need to use canvas.
Experienced embroiderers shared with us their tips for applying future designs to fabric:
- Having hooped the fabric, apply the design printed on thin paper and sew the outline manually or on a machine if you know how to sew with the conveyor lowered;
- draw the drawing with a chemical pencil;
- You can draw with a thin piece of dry soap, but not colored soap.
Choose any option, and don’t forget to break the pattern into sections, this will make it easier to embroider both a simple logo and a complex pattern.
Satin stitch embroidery patterns are varied, for example: 


And these patterns are suitable for embroidering a logo or a bright pattern: 

We hope that these design patterns, which you will copy onto transparent paper or directly onto fabric, will be useful to you for decorating clothes: 


Clothes with embroidery will always be original and unique!
Video: Learning to cross-stitch on clothes
Comments
Related posts:
 Embroidery on knitwear: decorating clothes with your own hands (patterns)
 DIY embroidery on a sweater (photo and video material)
Bead embroidery on clothes is a great way to relax! Many world-famous designers use bead embroidery in their designs. Such exclusive items are hand-embroidered with multi-colored beads, and everyone who wears such an outfit will shine and delight others! The main thing is to think through and tastefully place the embroidery on clothes. It is not difficult to master the technique - below we provide explanations, diagrams and a master class for beginners.
Embroidery looks especially attractive on black clothes. Black clothes embroidered with beads become solemn and are no longer associated with mourning. Take a look at these examples.
How to embroider a T-shirt with beads.
The combination of black and gold is always a winning option.

You can make it on a separate piece of fabric and then sew it on like an applique.

Embroidery with large rhinestones

Embroidery with threads and beads

A regular T-shirt embroidered with beads looks original!

Pearls, glass beads and rhinestones will turn an ordinary office shirt into an exclusive outfit.

Luxurious embroidery. A small embroidery on the sleeve radically changes the whole look.

This is real skill! It doesn’t seem difficult, but it’s very painstaking work.

Basic techniques of bead embroidery
Securing a single bead
The bead can simply be sewn with a stitch to the fabric, or you can use a smaller bead to make a small column. Instead of the bottom bead, you can insert a sequin. For volumetric sewing, you can make a column of two or more beads.

Beads of different colors and different sizes look very nice, sewn one by one close to each other. They can be placed inside a metal figure, inside a contour of contrasting beads, or applied in a chaotic scattering, creating bright spots on the embroidery.
Seam “Forward needle”
Bring the needle to the right side, place a bead on it and pass the needle through the fabric close to the bead. Bring the needle back to the right side, making a small stitch on the wrong side and thread the bead on again.

Lowercase seam
This seam in execution can be similar to either the “Forward needle” seam or sewing sewn together - you yourself vary the distance between the beads. If you want to give your embroidery rigidity or fix the beads on a straight or smooth curved line, then after completing the stitch, pass the needle in the opposite direction, then the beads will stand straighter.

Stalked seam
With this sewing method, the embroidery turns out to be quite stiff. Cast on 2 beads and pass the needle through the fabric to the wrong side near the second bead. Bring the needle to the front part between the first and second beads, pass through the hole of the second bead. Place the third bead and again pass the needle to the wrong side, close to the bead you just strung. Continue until you reach your desired stitch length.

Arched seam
The execution is similar to the previous stitch, only 2-4 beads are strung on a needle. With this sewing method, the beads are positioned more freely and the embroidery is less rigid.

The seam is fastened
For fastened sewing, beads are first strung on a thread, which is then sewn to the fabric with short stitches between the beads. Sewing together allows you to quickly make beaded items; it is no coincidence that the North American Indians gave this sewing method the name “Lazy Wife.” Lay the thread with beads on the fabric. Using another thread, sew a bead bottom through each bead (see picture) or through 2-3 beads.

Double-sided stem-line stitch
This seam is obtained from the two seams described above: line and stem. With this sewing method, the embroidery is stiff. The figure shows the operating procedure:

Double-sided seam
A bead is strung on the thread that sews the bead base to the fabric from the wrong side, and then the needle goes to the front part of the embroidery, a stitch is made that sews the bead base to the fabric. The needle goes to the wrong side, where before exiting to the front part, a bead is again strung on the thread.

Seam "Monastic"
For each stitch on the front side, one bead is strung, a diagonal stitch is made and the thread goes to the wrong side close to the bead. A vertical stitch is made on the wrong side, the thread comes out again to the front side and another diagonal stitch is made with a bead. Thus, on the front side you get diagonal stitches with beads strung on them, and on the wrong side the stitches are vertical.

Overcast seam
The stitch is made like an ordinary overlock stitch, only a bead is inserted into each loop.

How to make bead embroidery on a knitted T-shirt

Beginning craftswomen can handle this type of embroidery.
We will need:
- beads
- a needle with a thin eye so that even the smallest beads can pass through
- strong threads to match the T-shirt
- thin adhesive interlining
Take interlining no larger than the embroidery area.

Mark the borders of the embroidery with chalk

Glue non-woven fabric to the wrong side using an iron

You can draw a pattern or lay it out with beads and take a photo. The simplest version of the pattern from the same motifs.

Tip for beginners: work with the stitches that are most comfortable for you. It is most durable to embroider with a lowercase or stem stitch.

Start gradually sewing on the beads.

Sew the first motif in the middle of the sleeve

Repeat the motif just below the previous one. Just two identical motifs and gorgeous bead embroidery is ready!

How to make bead embroidery on a shirt.
If the fabric is not knitted, then you can do without interlining and embroider on a hoop.
Latest site materials
Horoscope
How to make a cardboard box with your own hands
The box is a wonderful thing in which you can store various little things. Not only is it functional, but it also brings a certain charm to the design of your room. However, you don’t have to go to the store and buy a suitable box. You can do it yourself
Experience
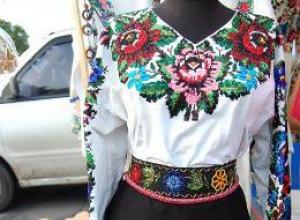
Making traditional Ukrainian embroidery with your own hands
Vyshyvanka is a national Ukrainian clothing that adorns anyone who wears it. Many people are interested in how to make such a piece of clothing on their own, how to embroider an embroidered shirt with their own hands. History of embroidered shirt According to archaeologists, the history of embroidered shirt has
Experience
Homemade surprises from the little princess: what to give dad for his birthday with his own hands?
Like all people, whether adults or children, dads love gifts, not only for birthdays, but also on other holidays. Parents are especially pleased with gifts from their beloved children made with their own hands. Things that parents usually keep
Health
What you can make from beads with your own hands: videos and diagrams with descriptions What you can make from unnecessary beads
Beading is a vast field of activity, here you can create completely different products: flat, three-dimensional. This article will tell you what you can quickly and efficiently make from beads available at home, and show you how to work with your own hands to get started.
Experience
Classic women's bags What bags are in fashion right now
“You can never have too many bags...” - no modern lady can disagree with this statement. After all, a handbag is the main women's accessory, which has a separate place of honor in a woman's wardrobe. A fashionable and spectacular bag for a woman is,
Horoscope
Features of shaving with a straight razor
So-called straight razors are becoming increasingly popular among men. This tool has enough advantages: it does not irritate the skin, the shaving is high-quality, and the process itself is interesting and entertaining for men. A straight razor may well


