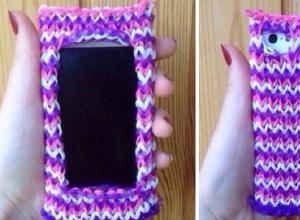
Crochet for beginners - how to learn from scratch. What to knit from leftover yarn for the home What can you crochet from threads
Of course, with the desire to learn how to do this and create beautiful, soulful things with your own hands. Crocheting, as the name of this type of needlework says, is carried out using a tool - a hook.
There are a variety of hooks: metal, wood, plastic and even ivory (I have one of these, a gift from my aunty knitter. To be honest, the tool is not suitable for knitting, but as a beautiful souvenir it’s very good, and also as a reason to show off to girlfriends with their “treasures”).
And hats and scarves are numbered from 2.5 to 6-7.
To start knitting and learning, a hook size 3-3.5 is suitable. And any yarn of medium thickness.
How to hold a hook.
Something else needs to be said about the position of the hook in your hands. Here everyone chooses the option that is most convenient for him/her)).
The figure below shows a method called "pencil". Simply grip the hook the way you would grip a pencil for writing.
The following picture shows the spoon method, in which the hook is held like a spoon while eating.
As you can see, everything is very simple.
Thread position when knitting.
Where the thread should be placed while knitting is shown in the figure below. A working area for the hook is formed between the index finger and thumb. The thread going to the ball is located under the middle, ring and little fingers. And the little finger lightly presses the thread against the palm so that it does not dangle. The free end of the thread is 4-5 cm. More is possible. When finished, I thread this end through a large eyed needle and carefully thread it into the work.
The basic elements of crochet are chain stitch, single crochet and double crochet. Let's look at how they are done one by one.
Start of knitting. Air loop.
So, you have a hook and a ball of thread in your hands. Where to start?) Any product begins with a chain of air loops. And it starts with the first air loop. We cross the thread with our fingers to form an ordinary loop and insert a hook into it, as shown in the figure.
We grab the thread with a hook and pull it into our ordinary loop.
Congratulations! You've learned how to make the first loop, and that's half the battle!)
At first, my hands will not obey you, my fingers will be tense, but this is a normal phenomenon for all novice needlewomen. With each new approach it will turn out better and better.
The second element is a single crochet.
As with any knitting technique, loops are added at the beginning of each row. When knitting a single crochet, one chain increase is made. Therefore, the hook is inserted into the second air loop from the hook.
Insert the hook, grab the thread and pull it through the loop.
Congratulations! You have mastered single crochet! Now the same needs to be done in the next loop and all other loops of the air chain.
This is what a row of single crochets looks like:
And this is what the pattern looks like, knitted with single crochets:
And the third important element is the double crochet.
If the row begins with a double crochet, then you need to make four lifting loops. Because the double crochet is higher than the single crochet. To make a yarn over, simply thread the yarn over the hook. And after that, insert the hook into the 4th free loop from the hook.
For knitting lovers, the “Everything Sama” website is a real find. Both experienced craftswomen and those who are just beginning to master this needlework can find interesting material and information here.
What sections on crochet do we have on our website:
- For those who are just taking their first steps in the knitting technique, there is a section “Learning to knit”. Here you can get your first skills, find out what tools are needed for this needlework, and understand the features of this or that yarn.
- The “Crochet” section of the site presents a variety of models of things that are made using the crochet technique. The most demanding craftswoman will find something new for herself here. Openwork pullovers, thick sweaters, light jackets - all this in such variety, with photographs of products, detailed descriptions of the work and diagrams, will allow even novice needlewomen to easily understand and independently knit the model they like.
- Crocheting is a fun activity. They can knit anything. This is confirmed by the gallery of presented models on the site page. Handbags, cosmetic bags and other hand-knitted accessories allow a woman to look more original and unique.
- You can crochet decorations for an elegant jumper, jacket, for a dress in the form of a flower, an openwork insert or other composition. With such decoration, the outfit will immediately acquire uniqueness and originality. The site has examples of making such decorations.
- A variety of children's toys, into which the mother has invested her warmth and care, will have a beneficial effect on small children. And on the site there are many works describing the knitting of such products. The sun, flowers, animals - you can knit all this for your child yourself.
- The master class section shows lessons with step-by-step instructions, descriptions and photographs of the work. These classes are taught by true masters of their craft. It would be useful for even experienced needlewomen to take a look at this section.
On the site you can share your achievements and exhibit your work. It’s nice when site visitors look at and appreciate your model.
Navigation on the site is simple and accessible. You can get to the section of interest from any page of the site. Take a look and you won't regret it.
A hook is a unique working tool, with the help of which for several centuries needlewomen have successfully knitted rugs and curtains, openwork tablecloths and napkins, warm blankets and bedspreads. It allows you to create magnificent things - hats, dresses, skirts, sweaters and even bright funny toys, fancy flowers and unique jewelry! To this day, many craftsmen prefer this particular tool, because it allows you to bring a wide variety of ideas to life. In this article we will tell you what can be crocheted and share with you clear patterns for making various products and their parts, including yokes, berets and potholders. And novice needlewomen will find detailed step-by-step descriptions of the work useful.
What can be added to the collection of ideas - a fun toy
Using a hook you can create not only bedspreads and tablecloths, but also magnificent toys. For example, you can make this cute elephant! This toy can become a real talisman that attracts good luck, bestows goodness and peace and protects its owner from all dangers. To work, you will need a hook number 3 and some yarn (about 50 g). Choose the color of the knitting threads the way you like. And our elephant will be green - Children's novelty", 200 m/100 g). We begin the work by making ears. We make a “magic” ring and 5 single crochets. Next we tie them according to the pattern:

By analogy, we also crochet the second ear of the toy. The diagrams clearly demonstrate the operating technology.
How to make the head, trunk and torso of an elephant?
After making the ears, we begin knitting other parts. We form a “magic” ring and knit 6 single crochets into it. We also perform the second and third rows with single crochets, without making any increases. And in the fourth and fifth we increase by knitting 7 single crochets. In the sixth and seventh rows we increase the number of sts. b/n up to 8. That's all, the trunk is ready.
Now let's start making the head. We increase the number of columns in the eighth row to 16 pieces. From the ninth to the sixteenth row we knit 24 stitches. We make increases according to the scheme “2 tbsp. b/n - 1 tbsp. b/n”. From the fourteenth row we begin to decrease the loops - we knit 16 stitches. To do this, we repeat the pattern eight times: “skip 1 tbsp. b/n - then knit 1 tbsp. b/n.” In the fifteenth row we reduce the number of loops to 12, making the necessary decreases. That's all - the elephant's head is ready.
We continue to knit the “Elephant” toy
Now let's start making the body of the toy by crocheting. The operation schemes are described below. In the sixteenth row we begin to increase - we perform 24 columns. To do this, knit 2 tbsp into each base loop. b/n. From the seventeenth to the twenty-first row inclusive, we knit 24 stitches.

From the twenty-second row we begin to decrease the loops. We knit 18 stitches. b/n. The pattern for decreasing stitches “2 double stitches - skipping a stitch” is repeated 6 times. In the twenty-third row we perform 12 columns, making decreases according to the same pattern. In the twenty-fourth row we perform 6 tbsp. That's all - the elephant's body is ready. We stuff the toy with padding polyester, sew up the hole and make a tail. We braid a pigtail of sufficient length from three strands, tie it, and leave a tassel at the end.
We perform the elephant legs according to the following scheme. We make a “magic ring”, dial 8 tbsp. b/n and knit four more rows in a circle with the same number of stitches. We fill the legs with padding polyester or cotton wool and sew them to the body. We attach the ears to the head. We make the elephant's eyes from two black beads. If desired, we decorate our toy with a bow.
Learning to knit bright potholders
What can you crochet? In addition to cute toys, you can make these colorful and very elegant oven mitts. They will add variety to the interior of any kitchen and will appeal to any housewife.

Next, we will tell you how it will not be difficult for novice craftsmen to make such a product. So, to make two similar potholders, you will need two skeins of white and red yarn, as well as hook No. 3. We will present how the work is knitted and descriptions below.
So, let's start making this beautiful kitchen accessory with a “magic” ring and three lifting air loops. Next, we knit 15 double crochet stitches and finish the row with a connecting loop. To complete the second row, take a thread of contrasting color and start working with one VP. Next we knit according to the pattern “1 single crochet - 2 ch”. We knit the entire row to the end and finish it with a connecting half-column. We start the third row with three VPs, perform three DCs and 1 VP. Then we knit 4 double crochet stitches and again 1 chain stitch. We continue to knit according to the pattern until the end of the row. We perform the fourth row with the same thread as the second. We knit 1 VP, then 1 tbsp. b/n and make a chain of 5 VP. We perform the entire row in this way. We complete it with a connecting loop.

We start the fifth row with three VP and 5 CH. Then we knit to the end of the row according to the pattern “1 VP - 6 CH” and finish the work with one connecting loop. To create the sixth row, we take a contrasting thread, the same one that was used for the second and fourth rows. We knit according to the pattern “1 st b/n - 7 VP”. Eighth row: we perform the binding as follows. Do 1 VP lift, then 1 tbsp. b/n, 1 half double crochet, 2 dc, again 1 half double crochet and 1 tbsp. b/n. That's it, the adorable potholder is ready!
Potholders "Watermelon slices": decorating the kitchen
What can you crochet to decorate your kitchen? Of course, bright and original potholders in the form of watermelon slices! Making them is quite simple. You will need thick woolen threads in three colors - red, green and beige. In addition, you will need black threads to decorate the watermelon “seeds”, a No. 4 hook and a needle.

We will tell you in detail what the procedure for making a crochet potholder is for beginning craftsmen. First, we make five air loops and close them into a ring using a half-column. To lift we perform one VP. Next, we knit several rows with single crochets, and then with single crochets, not forgetting about the necessary lifting loops and ending each tier with a connecting loop. After creating the red “pulp” of the watermelon, we proceed to the design of the white “rind”. We take the required knitting thread and create one row with double crochets. As usual, we close it with a half-column. By analogy, make a green “crust” using the yarn of the desired color. Now we fold the round piece in half and knit the two resulting layers together. You have a beautiful pot holder in the form of a slice. All that remains is to embroider watermelon seeds with black threads. We advise you to make stitches from the center of the slice. If desired, you can make a loop from a chain of chain stitches, tied with two rows of dc, and attach it to the potholder on one edge.
Let's make a crocheted bath sponge: diagrams and description

What can you connect? It is also easy to crochet a convenient accessory for a bath - a washcloth. This product not only perfectly cleanses the skin, but also produces a massage effect. A washcloth is crocheted very quickly and easily, so we recommend that beginning needlewomen try to make such a useful accessory. To work, you will need fairly dense ones and a hook number 4. It is advisable to choose bright yarn so that the product is pleasing to the eye. Linen threads can be replaced with nylon twine or sisal if desired. Let's start making the accessory by setting a chain of 40 VPs and closing it into a ring. We knit the first six rows with single crochets. The seventh and subsequent rows are made with long loops, which must remain inside the product. After the workpiece reaches the desired length, turn it inside out and connect the edges on one side. That's all - a comfortable washcloth for a bath is ready.
We knit an openwork dress for a one-year-old baby
In addition to useful household items and original toys, you can use a hook to make various wardrobe items. Using this working tool, you can knit the most delicate and very beautiful yokes that will decorate any dress. In this article we will share with you the technique for making a beautiful children's sundress.

It’s not at all difficult to make such a charming thing for a little fashionista. To work, you will need cotton threads (100 g) of yellow and pink colors. In addition, a hook No. 2.5 is required. This charming children's sundress consists of two parts - a yoke and a skirt, which are made in turn.
Let's make a yoke for a summer children's sundress
How to make this openwork crochet detail? With patterns that are clear and simple, a rectangular yoke is knitted quite quickly. In our work we will use this simple technology. To make the bodice of the sundress we take yellow threads. We begin knitting by making a chain of air loops of the required length (it should be equal to the circumference of the chest). Next, we create rows with single crochets. In the corners we make the necessary increases using an element consisting of 2 dc, 1 ch and 2 dc.

We knit five rows, following the pattern, and we get a charming yoke.
How to knit for a baby: diagram
Next, we proceed to making the sundress skirt. It can be made in any way - openwork, with a floral motif, or simpler, more laconic, made with ordinary single crochet stitches. We offer you this skirt design.

The skirt needs to be knitted in the round until it reaches the desired length. Then fasten the details of the sundress (for this you can use contrasting pink yarn). After the skirt and yoke are crocheted, we crochet the entire product. For example, you can design a dress with a “crawfish step” or any other openwork border. Our charming sundress is almost ready. All that remains is to sew buttons to the yoke and make eyelets, as well as decorate the product. As decoration, you can use crocheted flowers, satin ribbons, or a cord with tassels that can be threaded under the bodice.
Crochet a summer beret for a girl
We suggest you knit an openwork summer beret in addition to your sundress. It's very easy to do. You will need thin yellow crochet threads and a size 2.5 hook. The hat turns out to be light, openwork and very beautiful. Next, we will tell you in detail how to crochet children's berets. Schemes of work: let's start making the product with a “magic” ring and three air loops.

Next we will knit 15 double crochets. Let's complete the initial row with a connecting loop. Then we will perform three VPs and knit, alternating double crochets and chain stitches, as shown in the diagram. We’ll start the third row with three chain stitches and knit 2 dcs under the chain stitch of the base. We will perform the fourth and subsequent rows by analogy with the third, making the necessary increases and focusing on the presented diagram. As a result, you will get such a charming beret. The product can be tied with a contrasting thread, two rows of single crochets or a crab step. You can decorate such a product with an openwork volumetric rose. In such a summer beret, any girl will look like a real princess.
Instead of a conclusion
In our material, we described the patterns and sequence of work in the manufacture of crocheted knitted items. We hope you now know what you can crochet and what interesting ideas can be brought to life using this tool. Dare and create! Good luck!
To be able to skillfully wield knitting needles and create enchanting patterns on canvas, without resorting to any diagrams or descriptions, is the result of long and painstaking work. But women who have just begun to explore the world of knitting cannot do this. Therefore, today we invite you to consider what can be knitted quickly and easily.
Necessary knowledge to get started
Everything that can be knitted quickly and easily for beginners is based on basic working skills. You don't need any special knitting skills or the ability to read intricate patterns, but just know how the purl and knit stitches are knitted.
Knitting the front loop is as follows:
Working with purl loops is done as follows:

It is better to master knitting for beginners with products for children. When the work turns out beautiful, and all the stitches and eyelets are even, you can present the hats, slippers and baby vests to friends and acquaintances or keep them for yourself if you have a baby or are planning to do so soon. We take yarn, knitting needles and get to work.

Required materials:
- knitting needles 4 mm;
- 100% cotton yarn in pink and white.
Process description:

Attention: alternating rows should only be done when the work is knitted without turns. If on each new line you turn the product with the working thread towards you, then all rows are knitted only with facial loops.
Knitting a simple headband
If after the previous lesson you have some cotton yarn left, don’t think about throwing it away. Firstly, it is always useful for training on the next pattern. Secondly, now we will show you what can be knitted from leftover yarn. So let's tie an elastic headband or hair tie.
Knitting is one of the most popular types of needlework. Learning to skillfully use a crochet hook is quite simple. All you need is to learn the basics of crochet, which will be discussed in this article.
The Birth of Creativity
Crochet as an independent type of needlework originated in the 17th century. A definite answer about its origin has never been found. They say that crochet began to be used for tambour embroidery, and then it became an independent tool. Since crocheting requires more yarn than knitting, virtually nothing was known about this tool until industrialization. With the advent of machinery to clean cotton and turn it into thread, the cost of yarn dropped significantly. Since then, the first openwork made using a crochet hook appeared.

At first, only clothes and practical household items were knitted - blankets, curtains, rugs, pillows. The finest openwork lace was used to decorate them, the production of which was considered the height of skill. The complex technique of Irish lace appeared during times of famine and war. Peasant women sold their lacy ribbons to rich townspeople to earn their bread.

Now this type of creativity is not only practical, but also decorative. Using a hook, they create toys and crafts that have become very popular. By learning to knit, you can ensure your wardrobe is constantly replenished with great things.


How to choose a tool
The first thing to start learning knitting is to get to know the instrument better. It can be made of metal or plastic. Aluminum hooks are not in demand because... oxidize and spoil the yarn with an unpleasant coating. Stainless steel tools are often used.

A regular crochet hook consists of three parts:
- Handles;
- Heads;
- Grooves.
We hold the handle while working, so you should choose it according to your preferences. Some find it convenient to use a hook recessed into a plastic handle, while others find it convenient to use a regular metal one. Quite often you can find a tool with a groove in the center of the handle; you can safely buy it, because... These hooks are quite convenient to use. The length of the handle is also important, optimally if it is 12-15 cm. There are also longer hooks, they are designed for a separate type of knitting - Tunisian.
Pay attention to the head of the hook; it should not be pointed, otherwise the yarn will start to stick together or you will simply injure your hands while working.
The width of the head corresponds to the hook number. For beginners, medium-sized hooks - No. 3 or 4 - are ideal; they are very convenient to work with.

When choosing yarn, pay attention to its thickness. Most manufacturers indicate on the packaging information about which tool number to use.

If you have a skein without identification information, remember a simple rule: the thickness of the yarn is 1.5 times less than the size of the hook head. Try on the thread, passing it into the groove; if it does not slip out or fall through, then you have made the right choice. For the first lessons, take yarn with smooth monofilament, i.e. consisting of one thread. Acrylic or a mixture of acrylic and natural fibers is a good choice.

Correct hand position
Before you start, look carefully at the picture, it shows the correct position of your hands when working.

The working thread can be held in the following way.


Choose a method that is convenient for you. An important selection criterion is less fatigue in the hands.
Basic Techniques
If the knitting technique is familiar to you, then the first loop on the hook can be cast on in the same way as on knitting needles. If you are not proficient in either instrument, follow the instructions.
Take the hook in your working hand. Place the thread on the index finger of your free hand and insert the hook under it.

Make one revolution of the hook around its axis.

Holding the tail of the thread with your other hand, hook the working thread with the head of the hook and pull it through the loop on the hook. Adjust the size of the resulting loop.

To knit a chain of chain stitches, pull the working thread through the loop on the hook. Make sure all the loops are the same size. The air loop is indicated in the diagrams by a circle.

Now let’s look at the basic knitting techniques in pictures. They are quite easy to do. The pictures show the symbols of the elements.
Single crochet.

Half double crochet.

Single crochet stitch.


Artesanal column with one crochet.
Latest site materials
Health
Musical-rhythmic movements as a means of comprehensive development of a preschool child Stages of work on teaching children musical-rhythmic movements
Anna Belyaninova OPEN CLASS on the additional general education (general developmental) program “Curious Prodigy” Subject “Rhythmic mosaic” Topic: “” Group No. 16, 1 year of study Compiled by: additional education teacher B
Horoscope

Katy Perry's new haircut: a sign of the end of a love story?
Perhaps as famous for her hair colors and bold, captivating looks as she is for her music, Katy Perry has been wowing us with her all-eyes-on-me approach to hair and makeup since her very first appearance on the pop music scene.
Health
Scary stories and mystical stories
Mr. K., your friend, the Baroness, invited you to her castle for a few days. Unfortunately, you, along with several guests, are forced to stay here for six days. But this morning something happened... Mr. K's POV Day One One day I...
Cosmetology
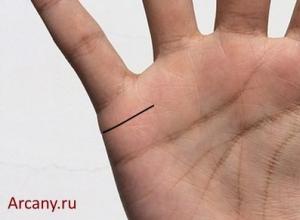
How can women tell by their hand how many marriages there will be?
People want to know a lot of things, including what the future holds for them. First of all, I am interested in the topic of marriage and love. The most asked question among girls in this area is: “When and how many times will I get married?” To find out, you don't have to contact
Experience
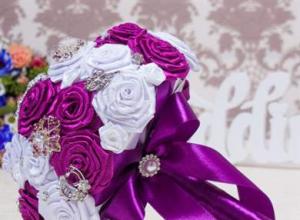
Kanzashi wedding decorations
Preparing for a wedding ceremony requires a carefully thought-out plan and scenario, and kanzashi wedding decorations will perfectly convey the sensual atmosphere of the holiday. A wedding is a unique event in the life of every person. For a perfect wedding, no
