Crochet summer baby hat (for a boy). Crochet knitted hat for a boy: description of knitting Openwork crochet hat for a boy
Based on this crochet hat for a boy, it is easiest to understand the principle of knitting hats for men and teenagers with a convex geometric pattern. They can be very diverse, these hats with convex columns.
They not only look good, but also fit perfectly on a man's head. They look moderately brutal, no matter how old the man is.
On a baby it looks both cute and “manly” at the same time. A crocheted hat for a boy is given with a description for a two-year-old child.

Description of knitting a hat


Materials and tools
- Yarn (55% cotton and 45% polyacrylic, 50 g/160 m) - 1.5 skeins
- hook number 3
The hat is knitted with convex and concave double crochets and half double crochets. We knit the last row with single crochets.
OG - 47 cm, bottom diameter should be 47 cm x 3.14 p (based on the loop test = 15 cm).
It is better to take 1 cm less for a better fit on the head, a total of 14 cm.
Knitting goes in a circle, each row is closed with a connecting column at the top of the first column of the row. We always start the next row with three lifting air loops.
Symbols in the text
- embossed double crochet - l.r.ssn
- embossed double crochet purl - p.r.ssn
- half double crochet (like a double crochet, but we knit all three loops on the hook in one step) - h/dc
Explanations for rows
 Bottom of the cap
- 1st row: we close 5 air loops into a ring, we knit 8 double crochets into it. Next, we will add 8 loops in each row to expand the circle.
- 2nd row: in each column we knit 2 l.r.dc = 16 loops.
- 3rd row: *1 l.r.ssn; knit 2 l.r.dc from one * repeat from * to * seven more times = 24 loops.
- 4th row: *2 l.r.dc; knit 2 l.r.dc from one * repeat from * to * seven more times = 32 loops.
- 5th row: *3 l.r.ssn; knit 2 l.r.dc from one * repeat from * to * seven more times = 40 loops.
- 6th row: *4 l.r.ssn; knit 2 l.r.dc from one * repeat from * to * seven more times = 48 loops.
- 7th row: *5 l.r.ssn; knit 2 l.r.dc from one * repeat from * to * seven more times = 56 loops.
At this stage, the diameter of the bottom was 8 cm. We have 8 wedges containing 7 loops of front relief columns. Next, we make the expansion by tying wedges between strips of embossed posts.
- 8th row: *7 l.r.ssn; 1 p/dc (it is knitted from the jumper between the front relief columns)* repeat from * to * seven more times = 64 loops.
- 9th row: *7 l.r.ssn; 1 l.r.dc (knit from the jumper between the previous l.r.dc and p/dc); 1 p/dc* repeat from * to * seven more times = 72 loops.
- 10th row: *7 l.r.ssn; 1 p/dc (it is knitted from the jumper between the front embossed posts); 1 l.r.ssn; 1 p/dc* repeat from * to * seven more times = 80 loops.
- 11th row: *7 l.r.ssn; 2 p/dc (the first according to the loops of the previous row, the second from the jumper between p/dc and l.r.dc); 1 l.r.ssn; 1 p/dc* repeat from * to * seven more times = 88 loops.
At this stage, the diameter of the bottom will be 12 cm.
Additional explanations. According to the rule of knitting caps, to obtain the shape of the cap we need, we need to make increments further through the row.
Accordingly, we will not make any increases in the next row, and here a new type of column will appear, due to which a relief strip is formed in the wedges.


- Row 12: * Purl 11; 7 l.r.ssn; 2 purl dc; 1 l.r.ssn; 1 purl dc* repeat from * to * three more times = 88 stitches.
This row forms our transverse stripes in the wedges.
The next row will be with increases. - 13th row: *7 l.r.ssn; 3 p/dc (2 according to the loops, the third from the jumper between p/dc and l.r.dc); 1 l.r.ssn; 1 p/dc* repeat from * to * seven more times = 96 loops.
At this point, the diameter of the bottom has reached the required 14 cm. And then we knit straight without any increments.
Additional explanations. The size of the bottom can be varied using the thickness of the threads, the number of the hook, the density of knitting, and the number of increases.
- 14th row: *7 l.r.ssn; 3 p.r.ssn; 1 l.r.ssn; 13 purl dc* repeat from * to * three more times.
From the 15th row to the 18th row we knit similarly to the 14th row. - 19th row: *7 l.r.ssn; 3 p/dc; 1 l.r.ssn; 1 p/dc* repeat from * to * seven more times.
- We knit rows 20 and 21 similarly to row 19.
- Row 22: * Purl 12; 7 l.r.ssn; 3 p.r.ssn; 1 l.r.ssn; 1 purl dc* repeat from * to * three more times.
- Row 23: knit similarly to row 19.
- From 24 to 28 we knit similarly to the 14th row.
- We knit the 29th row similarly to the 19th row.
- Row 30 - make decreases so that the hat fits more tightly to the head near the face. We also knit this row similarly to row 19, but where there are 3 p/dcs we make decreases by knitting 2 p/dcs together. Thus, we decrease 8 loops around the circumference = 88 loops.
- We knit the 31st row in the same way as the 12th row.
- Row 32 is the last one, we knit with single crochets.
You can continue according to the drawing if you need more depth for the header. The description is given from the author Yulia Dorokhova.
Men's crochet hats

Using the same principle as in the description above, a men's hat is crocheted. Its main advantage is that it fits on your head like a glove. And it doesn’t look like a banal “stocking” (to put it more precisely and rudely), which men don’t like so much.
Men are hard to please, even if you think a hat is great for warmth and looks good, they may have a different opinion. Try showing them this model. Perhaps they will like such a hat, and you will already know how to knit it.
Small plans to go shopping in search of a suitable cap or hat for your son for the summer can turn out to be a failure. The rich assortment of stores can unpleasantly surprise you with the lack of the right size or color of a summer hat or cap.
You can’t wear a dark hat in hot weather, and you need to choose the appropriate size. As a result, a planned shopping trip, which should not take more than an hour, can drag on for the whole day. If one day has already been lost in search of the right headgear for the summer, then it’s worth looking for options that will largely depend on you. For example, a summer hat for a boy can be crocheted.
There are not so many models of summer hats and caps, unlike models of summer hats and caps. It is also worth choosing color options from a fairly limited range of colors. An important point in preparing to knit a hat is the selection of a suitable pattern.
Pattern of a summer crochet hat for a boy:

For a summer knitted hat, it is better to choose threads from natural materials. In this master class, cotton threads are selected. 
The basic pattern of a boy's cap consists of 12 rows. In total, while working on the main drawing, 3 elements will be used:
- air loops (VP);
— connecting loops (cc);
- double crochet stitches (s1n).
Brief designations of elements are given in brackets. We will use them in the further description.
Crochet summer hat for a boy - master class for beginners:
The beginning of the work is a ring of air loops closed by connecting posts. In total you need to dial 6 ch in this ring. 
In the ring itself, and not in the ring loops themselves, we knit 11 s1n, and at the beginning of the row 3 lifting ch. The final element in this row will be the connecting column. In all subsequent rows, completion will occur similarly, i.e. using ss into the loop of the element of the beginning of the row. 
In the second row, the beginning is carried out by 3 lifting ch and 1 dc in the gap between the tops of the nearest dc of the previous row. In the next similar interval, 2 dc are knitted. This is followed by the skipping of 2 vertices with 1n and the knitting of 2 checkmarks is repeated again, each of which consists of 2 s1n with a combined base. 
In the third row above 2 ticks we knit 4 dc with a combined base in the space between the ticks. Next follows a chain in the form of 2 ch. In the arch of 2 ch from the previous row we knit 1 dc, 2 ch and 1 dc. We make a chain of 2 ch again and knit 4 dc in the space between the 2 ticks. 
In the fourth row, we alternate knitting 4 chains with a joined top and chains of 2 ch. 
In the fifth row we repeat the pattern of the third row. 
In the sixth and seventh rows we repeat the pattern of the fourth row. 

In the eighth row, the pattern repeats the pattern of the previous row, but the number of loops in the chains is no longer 2, but 3. 
The ninth and tenth rows are the same. First, 4 chain stitches are knitted with a joint base, then a chain of 2 ch, 1 chain stitch and again a chain of 2 chain stitches. Next, as we proceed, we repeat, starting with 4 dc with a combined base. 
In the next row, the main pattern is repeated, but above the top of the c1n a tick is formed from 2 dcs with a united base just at this top.
The last row of the pattern is also similar to the previous one, but 2 ordinary stitches are already knitted above the check mark. Next, this row is knitted again and again until the desired height of the cap is reached. Before the start of the level of the top of the ears, you need to leave a couple of centimeters to knit a strip of several rows of single crochets (sc). 

In the last row we leave 15 sc unknitted. 
This will be needed to create the ties on the back of the hat. To create the first tie, we knit 30 ch and in the opposite direction we knit sc along them.
We knit the remaining 15 sc and again make a chain of 30 chains, in the opposite direction along which we knit the sc. At the end of the row we complete it with 1 ss. 
Crochet summer hat for a boy, ready.


If at the end of the work you knit not just a strip of sc, but periodically make uniform increases, then you will get the brim of a panama hat. In this case, the ties at the back are no longer tied. 
A master class for beginners on knitting a hat was prepared by: Liliya Pervushina.
A hat for a boy can be knitted, or you can buy it in a store. We have compiled a small selection of interesting, in our opinion, models of knitted hats for boys. Knitting a hat for your boy is not only interesting, but it will allow you to choose good materials and a favorite style. And the boy will be proud that his mother knitted his hat. In addition, you will be able to fulfill any whim of your son/grandson. Sew his favorite hero onto a hat or embroider the name of a famous football player. For small children, you can knit a cozy helmet or hat with ears.
It seems that there are not so many ideas for knitting hats for boys. But in fact, take a look at our selection and you will see that this is not the case. The imagination of our craftswomen is inexhaustible. They knit hats with arans, with braids, with jacquard, hats in the shape of animals, caps, earflaps and many more interesting shapes can be found on the Internet. Knit to your heart's content!
Knitted hat for a boy - interesting models from the Internet
Gray hat for a boy with patterns
Cap size: for 6 years
Materials: yarn “Olga” -100 g gray, (50% wool, 50% acrylic, 392m/100g), circular knitting needles No. 2.5. Knit with thread in two folds.
Elastic band 2*2: alternate knitting of 2 persons. p. and 2 p. p.
Hat knitting density: 20 sts x 28 rows = 10 x 10cm.
Cast on 96 stitches and knit 6 cm in the round with 2*2 rib. Next, knit 35 rows in a relief pattern, as shown in the diagram. Decrease in every 2nd row by knitting 2 stitches together. before and after stripes of faces. loops
When 12 stitches remain on the knitting needles, pull them together with a working thread and secure the thread.


Knitted spring hat for a boy
This model of hat is closer to the classics, in style and design it is more similar to an adult, a small fragment helps to distinguish it from the many standard models.
Boy's hat with two-color rice pattern
Cap size: OG 52 cm.
For knitting you will need: Alize baby wool nits (40% wool, 40% acrylic, 20% bamboo. 50 gr. / 175 m) in two threads, stocking needles No. 4.5 and No. 5.5.
Hat for a boy in the shape of a fish
Knitted hat for a boy - MK from Ekaterina Zhukovskaya
You can knit this hat for both girls and boys. It all depends on the chosen yarn color and pattern.
Size: on OG=50cm. Yarn Gazzal Baby Wool in two threads, knitting needles No. 3. Knitting density 2.6p=1cm.
Set for a boy: knitted hat and track snood
Yarn BBB Premiere. Composition: 100% merino wool. Skein weight 50 g, thread length 125 m, knitted in 2 threads, knitting needles No. 3, No. 4. Consumption per cap is 85 grams, the height of the cap is about 21 cm. About 100 grams were spent on the snood. Snood height is about 16 cm.
Knitting a hat for a little boy with knitting needles
A hat for a baby from 1 to 18 months and from 2 to 4 years from Norwegian designers DROPS is knitted from Alpaca yarn from Garnstudio with knitting needles No. 2.5. You can use any yarn of suitable thickness based on the density of 26 p*34 rows=10*10 cm, knitted in stockinette stitch.
You will need: straight knitting needles No. 2.5, yarn - 50 g, markers.
Cap size: for exhaust gas 40/42-42/44-44/46 (48/50-50/52).
Basic knitting: stockinette stitch.
Traditional shaped boy's hat
Cap size: for 0-9 months (it all depends on the thickness of the yarn).
You will need: 25 g 100% virgin wool ( 50g/216m); straight knitting needles No. 2.
Knitted green hat for a boy
This comfortable model is suitable for real athletes - a hat for a boy with a visor and ears.
Knitted car hat for a boy
The hat is knitted using stockinette stitch from yarn of three colors. Its highlight is thermal stickers in the shape of cars. The stripes on the cap imitate the road, and the cars complement the automotive theme.
Interesting knitted hat for a boy
The calculation and description of the cap are given for an adult. But if you reduce the number of stitches cast on, then such a hat can be knitted for a growing boy.
Blue cap - knitted helmet for a boy
Cupcake hat knitted with knitting needles
If you choose a different color for this model, then it can be knitted for a boy.
Description of a knitted hat for a boy:
Knitted hat - budenovka for a boy
We knit a baby hat with ears, which is very important for a little person. This cap fits well on the head, does not move and the ears are closed. Any novice craftswoman can handle the hat. After all, women often start knitting only with the birth of their firstborns and do it with great pleasure and love.
Description of the knitted hat
Knitting pattern for a hat
Excellent model of a knitted hat for a baby
Cap sizes: 1/3, (6/9), 12/18 months. You will need: 50 g of Qual Merino Extra Fine yarn (105 m/50 g) and knitting needles No. 4.
Persons smooth surface: faces. rows - persons. loops, purl rows - purl. loops.
Garter stitch: knit. rows, purl rows - persons. loops.
Density of knitting hat, faces. stitch: 21 loops and 28 rows = 10 x 10 cm.
Knitted hat, job description
Cast on 97 (105) 109 stitches and knit 4 rows in garter stitch. Then mark the following 7 loops with a thread: 1st, 18th, 35th, 49th, 63rd, 80th and last (1st, 20th, 39th, 53rd, 67 -th, 86th and last) 1st, 21st, 41st, 55th, 69th, 89th and last loop. For next additions to persons. rows, perform 1 yarn over and purl. rows knit it purl. cross, for decreases on both sides, perform 1 double pull (= remove the marked loop together with the previous loop as a knit, 1 knit loop and pull it through the removed loops).
Next knit faces. stitch and perform increases and decreases. in this way: in every 2nd row after the 1st mark, add 1 loop, on both sides of the 2nd mark, decrease 1 loop, before the 3rd and after the 5th mark, add 1 loop, on both sides of 6 1st mark, decrease 1 loop and before the last mark, add 1 loop at the same time in every 4th row after the 3rd and before the 5th mark, add 1 loop, as well as on both sides of the 4th mark (= middle) Decrease 3 (4) 5 x 1 stitches in every 4th row, then in every 2nd row. After 13 (15) 16 cm from the cast-on edge (measure along the outer teeth) in the next face. row, knit every 2nd and 3rd stitches together. and at the same time close the loops.
Occipital part: Sew the closed edge, then sew the side edges of the piece. The cast-on edge forms the front side of the hat.
Ties: cast on 4 loops respectively and knit next. way: * 1 persons. loop, thread before work, remove 1 loop as purl. thread at work, from * repeat 1 time, turn, from * repeat. After 20 (22) 24 cm close the loops. Sew the ties to the bottom edge of the hat.
The hat is ready!
Knitted elf hat
In this version, the cap is knitted in one piece, folded in half and sewn at the back. A strip is sewn to the hat along the bottom edge, tightly securing the hat to the baby's head. For the hat, choose a soft blended yarn so that the hat is not scratchy.
Description of the knitted hat
Knitted hat for a boy - models from our website
Knitted blue hat for a boy
Knitted hat for boy
In order to determine the knitting density, you need to knit a sample of approximately 15x15 cm and count how many loops and rows are in 10 cm. First wet and dry the sample. Stretch slightly when measuring. Knitting density: 1 cm – 2 loops; 1 cm – 2.5 rows.
Knitted winter hat for a boy
Knitted hat with earflaps for a boy
Knitted cap for a boy
Most often, on knitting sites there are a lot of knitted hats for girls, but finding an interesting model of a knitted hat for a boy is more difficult. This khaki braided cap is certainly interesting and fashionable.


In late spring and summer, children need to wear summer hats instead of the usual hats to protect their heads from overheating by the sun's rays. A summer hat will also protect your baby from sunstroke during prolonged exposure to the sun. The natural materials of such hats absorb excess moisture well and keep the baby comfortable outside for much longer. To create a summer hat, this tutorial uses cotton yarn of different shades.
You will have to knit the hat following the pattern.

General recommendations for knitting:
- knitting begins from the center, which is a ring of air loops (ch);
- next we will use ch, double crochet (s1h) and connecting loops (sp) at the end of each row;
- to start each row it will be necessary to knit lifting elements;
- the main pattern of the upper part of the cap consists of 12 rows, each of which is indicated in the diagram with a separate color.
So, let's move on to the description of the knitting process itself.
The start ring consists of 6 ch.

A block of 11 chain stitches is knitted into this ring, before which 3 lifting chain stitches are knitted.

The second row also consists of 11 dc and a lifting chain of 3 ch, but between the columns we already knit 1 ch.

In the third row, we knit 4 dc into arches from ch.

The fourth row repeats the alternation of the second row.

In the fifth row in the arches between the columns we knit 3 s1n.

Again we knit a row similar to the second.


After knitting a row similar to the second, we knit a row where 2 dc are knitted into the arches. Next, we again knit a row similar to the second.

In the eleventh row, we alternately knit 3 or 2 s1n into the arches. After this, we knit the stitches again, alternating them with 1 ch.

We repeat the row where 2 dc are knitted into the arches, and after it we knit a white row of stitches and air loops.

The next stage of knitting is to alternate the pattern of the thirteenth and fourteenth rows without increasing the number of loops and stitches. The height of the hat should be adjusted by periodically trying the hat on the child or checking the height with a regular hat of the right size if it is not possible to try on an intermediate version of a knitted hat.

The final stage of knitting consists of knitting single crochets (sc).

We knit 4 rows of sc without increasing the number of loops. After this, we knit a row in which we knit 2 sc into every fifth top of the sc. After this, we make a row of sc without increasing, but using yarn of a different color. Again, the white row is knitted with an increase in the number of loops by knitting 2 sc in every sixth top. Next, several rows of sc are knitted without increasing the number of rows. After the white one, we introduce a beige row, again a white one, and finish knitting with orange yarn.

As a result of many hours of work, I got this hat for walking in sunny weather.


And this is a hat along with the same sandbox, under which the colors of the yarn were selected.
Latest site materials
Horoscope
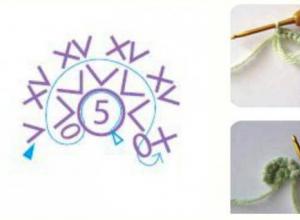
What to knit from leftover yarn for the home What to crochet from thread
Of course, with the desire to learn how to do this and create beautiful, soulful things with your own hands. Crocheting, as the name of this type of needlework says, is carried out using a tool - a hook. There are a variety of hooks: metal, wooden
Horoscope

Proper swaddling of a baby in the maternity hospital
When a newborn is born, parents try to properly care for it. In the first months, many mothers decide to swaddle their babies. To avoid problems, you need to do it correctly. Preparation for the procedureTypes of swaddling of newborn babies: tight
Cooking
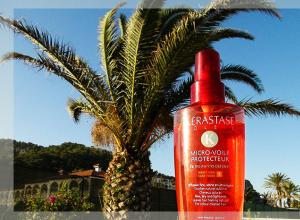
Hair cosmetics from the sun
Do you like to take a place in the sun? Then your hair just needs hair products with UV protection! Bright rays can lift your spirits, give warmth and saturate the body with vitamin D, essential for health, and also destroy
Health
Musical-rhythmic movements as a means of comprehensive development of a preschool child Stages of work on teaching children musical-rhythmic movements
Anna Belyaninova OPEN CLASS on the additional general education (general developmental) program “Curious Prodigy” Subject “Rhythmic mosaic” Topic: “” Group No. 16, 1 year of study Compiled by: additional education teacher B
