New Year's crafts for children 4 years old. Simple New Year's crafts with children: inspiring ideas and master classes
There is very little time left until the New Year, and it’s time to think about holiday decorations for the home. You can buy ready-made options in the store, but it’s much better to make original things with your own hands.
Snowman made from a sock

You can make these funny snowmen from unnecessary socks. You will need socks, rice for filling, some scraps and buttons. Cut off the toe of the sock and tie it with thread on the other side. Pour the rice into a round shape, tie it again with a thread and add more rice to form a smaller ball. Sew on the eyes and nose, make a scarf from a scrap, sew on buttons. And the cut off part will make an excellent hat.
Christmas tree pendants

A cinnamon stick is used as a base; several artificial spruce branches and multi-colored buttons are attached to it using glue. Such Christmas trees will not only decorate your home, but also fill it with the warming aroma of cinnamon.
Deer from traffic jams

Bottle caps are an excellent craft material. For example, you can make such a cute deer. You will need some corks, glue and various beads for decoration. It’s not a shame to hang something like this on a Christmas tree.
Crafts from sticks

From ordinary ice cream sticks you can make cute Christmas trees, snowmen and snowflakes. All you need is paint, glitter, buttons and a little imagination. Even the smallest children can handle these.
Christmas trees made of colored paper

You can make such wonderful Christmas trees by making a cone out of green paper or cardboard and decorating it with different things. Buttons, pebbles, beads and various paper figures are suitable.
Potato drawings

This cute print is made by dipping half a potato in regular gouache. And the adults will need to paint on the rest when the paint dries. This option is ideal for very young children.
Snowflakes made from pasta

Attach pasta of different shapes with glue and cover with silver paint, secure with ribbon - an unusual New Year's snowflake is ready.
Snowmen made from lids

Cover metal bottle caps with white paint (it’s better to use acrylic) and glue them together, as shown in the picture. Draw a face on the snowman and decorate it with a scarf made of bright ribbon. If you glue a loop on top of it, such a snowman can be hung on the Christmas tree.
Crafts from pine cones

You can make different animals and any other characters from the cones. You need paints, scraps, buttons and, of course, imagination and inspiration.
Christmas tree made of buttons

Select green buttons of different diameters and a few brown ones for the top and secure them with thick thread. Decorate the crown with a star.
Painted balls

Place pieces of wax crayons in a transparent Christmas ball, heat it with a hair dryer, constantly twisting it. When the pencils melt, they will leave beautiful colored streaks inside the ball.
Garland of fingerprints

Draw the cord of the garland and the base of the light bulbs, then give the child multi-colored paints and let him draw bright light bulbs with his fingers. You can decorate a New Year's card or gift bag with this design.
All children love to make various crafts with their own hands, especially if loving and caring parents help them with this. Beautiful and cute little things made from scrap materials can decorate your home for the holidays or act as a gift for close relatives and friends.
On the eve of the New Year and Christmas, such crafts become especially relevant, because in this fabulous time you want to be imbued with a magical mood and give it to others. In this article we will tell you what New Year's crafts you can make with 3-4 year old children to give them to loved ones or to decorate the room.
The simplest New Year's crafts for children 3-4 years old
New Year's crafts that can be done with a 3-year-old child should be the simplest, since the baby does not yet have enough skills to make any complex accessories and cannot work with some materials.
As a rule, New Year’s crafts are made with a 3-year-old child, the main elements of which are drawings and applications. For example, on an ordinary sheet of paper you can draw the main symbol of the New Year - a Christmas tree using finger paints or gouache. While the paint dries, you need to cut out various decorations from colored paper - small multi-colored balls, stars, a sun, a month, and so on.
All these elements need to be glued on top of the picture using the appliqué technique. In addition, you can use other items, such as brightly colored buttons, pasta, nuts, and so on. After the Christmas tree is “decorated”, it must be greased again with office glue and sprinkled with semolina to create an imitation of the fact that our forest beauty is dusted with snow.
In a similar way, you can make a snowman figurine on a sheet of colored paper or cardboard. His body can be cut out of white paper and glued to the base or painted with paints. Also, cotton wool or cotton pads are often used for this. You can decorate this craft in any way.
You can also make a variety of New Year’s crafts from plasticine with 3-year-old children. These include all kinds of Christmas trees, funny figures of Father Frost and the Snow Maiden, and bright Christmas tree decorations. The latter, by the way, do not have to be done independently. Three- or four-year-old children enjoy decorating plain Christmas tree balls with their own hands using felt-tip pens, paints, plasticine, glue and a variety of small objects.
 |
 |
 |
 |
 |
 |
More complex New Year's crafts for kids aged 3-4 years
You can make more complex New Year's crafts with a 4-year-old child, however, for this he will definitely need the help of his parents. In particular, to create applications, you can use such complex material as corrugated paper. It requires careful handling, so if the baby tries to do something on his own, he most likely will not succeed.
If the child is already 4 years old, New Year’s crafts in the form of Christmas trees can be made from any available materials. For example, you can twist a sheet of whatman paper into a cone shape and fix it in this position with glue. The outer surface of such a Christmas tree can be covered with pine cones, multi-colored buttons and any other objects, and painted with green paint on top.
In addition, with the help of his beloved parents, the baby will effortlessly cope with the creation of various crafts that use elements and. Such entertainment will not only bring pleasure to the child, but will also contribute to the development of fine motor skills of his fingers, which will certainly affect the expansion of his vocabulary.
In addition, today on sale you can find a wide variety of balls, snowflakes, Christmas trees and other New Year attributes in the form of foam or wood blanks, from which you can create toys and home decor with your own hands, using acrylic paints, glitter, and glue. Also, using such blanks, you can make Christmas tree decorations using the decoupage technique, preparing only beautiful napkins with a New Year's pattern and regular PVA.
Making something for the New Year is easier than it seems. Website “Mom can do anything!” I have collected a selection of simple, but very effective and beautiful crafts that are easy to make with children for the holiday. And thanks to the description and photo master class, it will be easy to make them. They will decorate your home for the holiday, and they can also be taken as a New Year's craft to a kindergarten or school.
Small Christmas trees in five minutes.
- Cover the cardboard on both sides with double-sided tape.
- Cut out equilateral triangles from it.
- Remove the protective strip from the tape and wrap the threads around the Christmas tree.
- Sew beads and loop. The Christmas tree is ready!
Asterisks

A simple card made together with the children.
We've all had to sharpen pencils, but few people thought that pencil peelings can also be used to make crafts. Glue them onto paper in the shape of a Christmas tree, add a trunk and a star - the card is ready! 
Small Christmas trees:

Snowman made of cotton pads.
- Take two cotton pads and sew their edges with thread.
- Use glue to fasten them together.
- Make a scarf from threads.
- Glue the buttons.
- Make handles from wire.
- Add a triangular nose.
- Paint the eyes and mouth.
- Glue the cardboard hat.
Christmas tree decorations made of corrugated cardboard.
It’s easy to make original Christmas tree decorations from corrugated cardboard of different colors. Stars, Christmas trees, circles of different sizes will look great. 
Christmas tree forest.
You can make such a forest in literally five minutes. All you need is paper, a wooden skewer, a hole punch and a base. Wooden circles, plastein, or a pot of sand are used as the base. 
A few more ideas for New Year's crafts 


A very good way to spend time is to make something with your own hands for the holiday, involving children in this wonderful activity. Let them also feel involved in preparing the holiday. It also helps them develop their imagination.
1. Black and white print of a Christmas tree that you can decorate with your children. 
Or this one (we are now painting it ourselves)

2. A Christmas tree figure cut out of felt, which can be decorated differently every day. 
3. DIY December calendar. Each day on the calendar is a different toy, and children can be an invaluable help in coming up with the toy's pattern. 
4. Popcorn garland. It's simple - popcorn, needle, thread. 
5. Cardboard cones decorated with wrapping paper, bows and stars. Nothing complicated! 
6. Wall decoration or on a shelf - a Santa Claus hat made of cardboard in wrapping paper, instead of fur and a pompom - cotton wool. Even small children can handle it. And then you can take a photo with the result of your work. 
7. You can paint on paper not only with watercolors, but also with unusual materials - for example, mix flour, water, and drop a little paint there. Draw various shapes, dry until hardened. 
8. You can make small “drums” out of plain paper and wrap them with shiny garland or tinsel. You will get these cute hanging decorations or toys for the Christmas tree. 
9. If you add eyes, noses, and horns, the little ones’ footprints will turn into majestic reindeer from Santa Claus’s team. 
10. Drawings made from fingerprints on Christmas tree decorations will look great. And the memory will remain. 
11. Again - prints of children’s heels, but on a panel, in the form of Christmas tree decorations. 
12. Christmas tree decorations - snowmen. Materials: bottle caps, buttons, threads and ribbons. 
13. Toys in the form of deer from puzzle elements. 
14. Toys with family photos, and during the holidays the tree turns into a family tree. 
15. Mittens made of cardboard and paper for crafting. Purpose - any, at will, decorating various objects. Or on a Christmas tree if you add thread. 
16. Rings made of colored paper, decorated with ribbons and large beads, can become wonderful toys for the Christmas tree. 
17. A wreath and a “candy cane” made from small pom-poms on a cardboard base. The result was some funny Christmas tree decorations. 
18. If you roll a lot of polymer clay balls of different colors, then you can glue them onto cardboard wreaths lovingly cut out by mom or dad. Makes a wonderful decoration for a door or wall. 
19. Plain parchment can become festive wrapping paper for gifts if you decorate it with tiny pompoms. Attach with glue. 
20. Nativity, hand-drawn, in Naive style. It's decorated with pencils, which gives the scene a completely childlike look, which is wonderful. 
21. Old wooden cubes on which you can stick photographs of children will make a wonderful decoration for the holiday tree. 
22. A Christmas tree made of colored ice cream sticks, instead of toys - multi-colored buttons. 
23. Paint a Christmas tree decoration black and it turns into a magic board on which you can draw with chalk! 
24. Snowman made from pompoms! Wonderful toy for the Christmas tree 
25. Cinnamon gingerbread cookies can also be a wonderful decoration for the Christmas tree. And then you can eat them! 
Here are some exciting ideas for crafts with children that we offer you! Nothing complicated, but the result is amazing.
Create with love.
On the eve of the New Year, many begin to think about how to create a holiday atmosphere at home.
First of all, it is a joy for children who are waiting for gifts, the arrival of Santa Claus and love decorating the Christmas tree.
The child will be pleased to see the toy he made with his own hands hanging on the lush paws of the New Year's beauty.
This article will talk about the process of making New Year's toys with children 4-5 years old, with step-by-step instructions.
During the procedure for making crafts, the child should be given the opportunity to express his imagination by making any additions to the craft.
Carry out all processes associated with the use of piercing and cutting objects yourself to avoid injury to the baby.
A child can make such a toy independently, without outside help. An adult just needs to follow the process, help the child in some difficult moments, but at the same time give him complete freedom of imagination.
 You will need the following material:
- Any plastic or paper cup.
- Colored tape (2-3 colors is enough).
- Stickers (confectionery).
- Scissors.
- Ribbons of different colors.
- Glue.
- Paints (preferably gouache).
Manufacturing process: a small hole is made in the bottom of the cup through which a ribbon tied in a loop is passed.
This will make the glass look like a bell. Turn it upside down and give your baby the materials that were prepared for decoration. He will show his imagination and decorate the New Year's toy himself.
Multi-colored garland
One of the main attributes of the New Year holidays is a garland. It can be used to decorate both a Christmas tree and door or window openings.
- You will need the following:
- Glue.
- Scissors.

Colored paper (3-5 colors will be enough).
The simplest garland made of colored paper This way, you will gradually form a multi-colored chain. You can make a similar decoration of any length and different alternation of colors.
Festive Christmas tree
What is a holiday without the main symbol of the celebration - a decorated Christmas tree. This toy is used to decorate a table, window or shelf. It can also be presented as a gift to relatives or friends.
What do you need:
- Set of colored paper.
- Cotton wool.
- Cardboard.
- Scissors.
- Small pastry stickers.

Cardboard Christmas trees
How to make: take a sheet of green paper and cut strips 15, 10, 7 and 4 cm wide from it. Fold each of them like an accordion, then glue the ends together so that you get voluminous snowflakes. Glue the largest one to a sheet of cardboard, and the rest, in ascending order, are fixed on each other with glue. You should end up with a Christmas tree, which is decorated with stickers, and cotton wool imitating snow is glued to the cardboard.
Cut a strip 2 cm wide from a red sheet of paper and make a voluminous snowflake out of it, as described above - this will be a star on the spruce. Secure it on the top of your head. The elegant beauty is ready.
Fairytale decoration
Pine cones are often used to make various crafts. This natural material has a beautiful shape and unusual appearance. And if you give the cones a different color and make an applique out of them, you will get a truly fabulous decoration that can be hung on the Christmas tree.
 What you will need:
- Pine cones (5-7 pieces).
- Paint (gouache).
- Gift ribbon (any color).
- Scissors.
- Sheet of cardboard.
- Green tinsel.
Manufacturing process: the cones are pre-painted green one day before the gouache is completely dry (the time it takes for the gouache to dry) before making the craft.
Circles with a hole inside are cut out of cardboard (as many cones, so many circles). Glue tinsel along the edge of the circle on each side so that there is room to fix the pine cone.
Then the cone is glued to the circle with the back part (it is best to use liquid glue for secure fastening). We make a loop from a gift ribbon and fix it on the circle on the side opposite to the glued pine cone. The decoration is ready.
Fun mittens
Every child has ordinary, inconspicuous mittens. But, if you make them yourself in the form of a toy, you will get a very beautiful and unusual craft. Such mittens do not perform their main function - keeping warm, but they are suitable for playing in a warm room.
Material for making:
- Thick cardboard (colored).
- Glue.
- Semolina.
- Nail polish.
- Scissors.
- Colored paper.
- Markers (2-3 colors).
- Stapler.
- Cotton wool.
- Fishing elastic band (thin).
How to make: Place the baby's mittens on the cardboard and trace them along the outline, then cut out 2 pairs. Start decorating them.

Craft mittens
The first pair. Various patterns are drawn on the surface of the cut out mittens with glue, then semolina is sprinkled on top. Small snowflakes (2-3 cm in diameter) are cut out of colored paper and glued between the “manna figures”.
Second pair . The edges of the mittens are covered with a layer of nail polish (approximately 0.5-1 cm). Then, various New Year's figures (Christmas trees, snowflakes, balls, etc.) are drawn in their center with a marker. Snowflakes are also glued to the surface, as in the first pair.
When decorating the toys is finished, you need to secure the elastic band to the back of the mittens. To do this, it is fixed at the base and in the center along the edges.
It is important that it does not put pressure on the baby’s hand, so when attaching it, you should not pull it. The mittens are ready.
New Year's picture from cereals
 All children love to sculpt from plasticine, as well as make various crafts from cereals.
We will combine these two activities and make a New Year's painting, which will be an excellent gift for the New Year.
The following is required:
- Cardboard (any color).
- Plasticine (color different from cardboard).
- Cereals (buckwheat, rice, etc.).
- Toothpick.
How to make: pre-crushed plasticine is spread on the surface of the cardboard. The layer should be small (1-2 mm). Then, using a toothpick, a pattern is applied to the surface of the plasticine (you can draw a Christmas tree, a snowman, a bunny, etc.). After application, the figures are filled with various cereals, at the child’s discretion (let him do this creative process himself).
When the picture is ready, you can add an inscription to it in the form of a congratulation or the baby’s name.
Santa Claus under the Christmas tree
The owner and keeper of New Year traditions is Father Frost. It is believed that if this fairy-tale character is not under the tree, then happiness will not come to the house in the coming year. In this regard, it can be made from available materials and involve the child in this process.
For the craft you will need:

- 2 sheets of cardboard (red and white).
- Colored paper.
- Plasticine.
- Corrector.
- Scissors.
- Cotton wool.
- Thick thread or rope (piece 10-12 cm long).
- Glue.
- Plastic bottle cap.
Manufacturing process: the fairy-tale character is made in 2 stages - Santa Claus himself and his bag of gifts.
Father Frost. Roll the red cardboard into a cone, glue it and cut off the bottom to create a stable base - this will be the body of Santa Claus. Cut 1.5-2 cm from the top of the cone. Cut an oval out of white cardboard - this will be the grandfather’s face, which needs to be glued to the top of the cone (body). Using plasticine, make eyes, a mouth and a nose on the face, and also glue cotton wool at the bottom of the oval - this will be a beard. From red cardboard, cut out an uneven triangle that will be your grandfather's hat. It needs to be attached to the head with glue. Draw snowflakes on the body of the figure using a corrector.
A bag with presents. Take a 10x10 cm sheet of cardboard and place a cork in the center of its back side. Then lift up all the corners of the cardboard and tie them with thread (rope). Draw various patterns on the bag using a corrector.
Glue the bag to the Santa Claus base. That's it, the toy is ready, you can put it under the Christmas tree or give it to someone.
Postcard in the form of felt boots
New Year is the time for gifts to be given to each other. Make an original card with your child and give it to your beloved grandmother or grandfather.
 Material for making:
- Paint (gouache).
- White paper.
- Markers or pencils.
- Cotton wool.
- Glue.
How to make: fold a piece of paper in half and draw a felt boot on it so that the bend line is its back part, and cut it out.
You should end up with a folding postcard in the shape of Russian national shoes.
Inside the postcard, on one side you can draw any shape (Christmas tree, bunny, snowflake, etc.), and write a congratulation on the other. The outer side of the card must be decorated with felt-tip pens or pencils (entrust this work to a child), and also small pieces of cotton wool in the form of snowflakes must be glued. The postcard is ready, you can give it to relatives or friends.
Christmas tree toy made from dough
All children love to tinker with dough, roll it out and sculpt it. In the process of making such toys, you can feel like a cook, since the action is more reminiscent of baking cookies than creating a craft.
The key to this process is to create a dough that dries very strong.
To do this, add a large amount of salt to it. What you will need:
- 1 cup flour.
- 0.5 glasses of water.
- 0.5 cups salt.
- Rolling pin.
- Cookie molds (in the form of Christmas trees, balls, stars, animals).
- Paints (gouache).
- Threads.
Manufacturing process: First you need to prepare a thick dough. To do this, mix salt with flour, add water and mix thoroughly until a homogeneous consistency is formed. When the dough is ready, it is rolled out into a layer of 1-1.5 cm and various figures are cut out using cookie cutters, with thread loops attached to the top of them.

Dough toy
Place the dough figures on a baking sheet, previously covered with baking paper, and place it in the oven for 2 hours at a temperature of 50-60 degrees, but no more, as future toys may crack.
After drying, let the figures cool and begin painting them with gouache paints. Ready!
Conclusion
Whatever the result of the crafts, the main thing here is the child’s interest in the very process of making toys. Try to help your child as little as possible in the making process (except for cases of cutting and piercing), let him be proud of the fact that he made the craft.
Video on the topic
- Horoscope
How to choose a high chair for feeding a child so as not to make a mistake?
- Experience
Simple New Year's crafts with children: inspiring ideas and master classes
- Horoscope
A gift to poor pensioners from Medvedev - a one-time handout instead of indexation of pensions
- Cooking
- Experience
Problems with fathers and children, or what to do if the father does not love
Latest site materials
Experience
Fashionable manicure for short nails with video and photos
It would seem that just recently our women’s world was overwhelmed by the fashion for long, sharp or square nails. However, time moves, fashion changes, and now at the peak of popularity is a completely opposite option - short nail length. In this article we will
Horoscope
Craft for children: paper cockerel
According to the eastern horoscope, the “master” of the New Year 2017 will be the Fire Rooster. The wild temperament, cocky character and truly fiery temperament of this fighting bird will accompany us next year. And in order to “appease” the bird and get it
Cosmetology
Features of the development of voluntary behavior in preschool children Arbitrariness is formed in a preschooler in
Reading time: 9 minutes.
Health
Views 11.2k.
Goal To systematize the knowledge of teachers in the field of TRIZ - pedagogy To put in the hands of educators a tool for specific practical education in children of the qualities of a creative personality, capable of understanding the unity and contradiction of the world around them, and solving their own problems.
Cooking
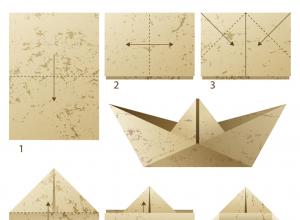
DIY origami. Paper figures. Paper origami for beginners Simple modular origami for children 6 years old
The art of creating figures from a sheet of paper has Japanese roots. Once upon a time it was available only to rich and noble people, it developed in monasteries and had a sacred meaning. About 800 years ago, thanks to cheaper paper, origami began to gain popularity.
Health
Why does Santa Claus give coal to bad children?
One mention of a cheerful man in a red cap immediately gives rise to memories of a happy childhood, the anticipation of the holiday, gifts under the tree and various kinds of goodies. The prototype of Santa and Grandfather Frost was Saint Nicholas, who did not live in the North at all